Instalar AdSanity no es diferente a instalar cualquier otro plugin desde el panel de control.
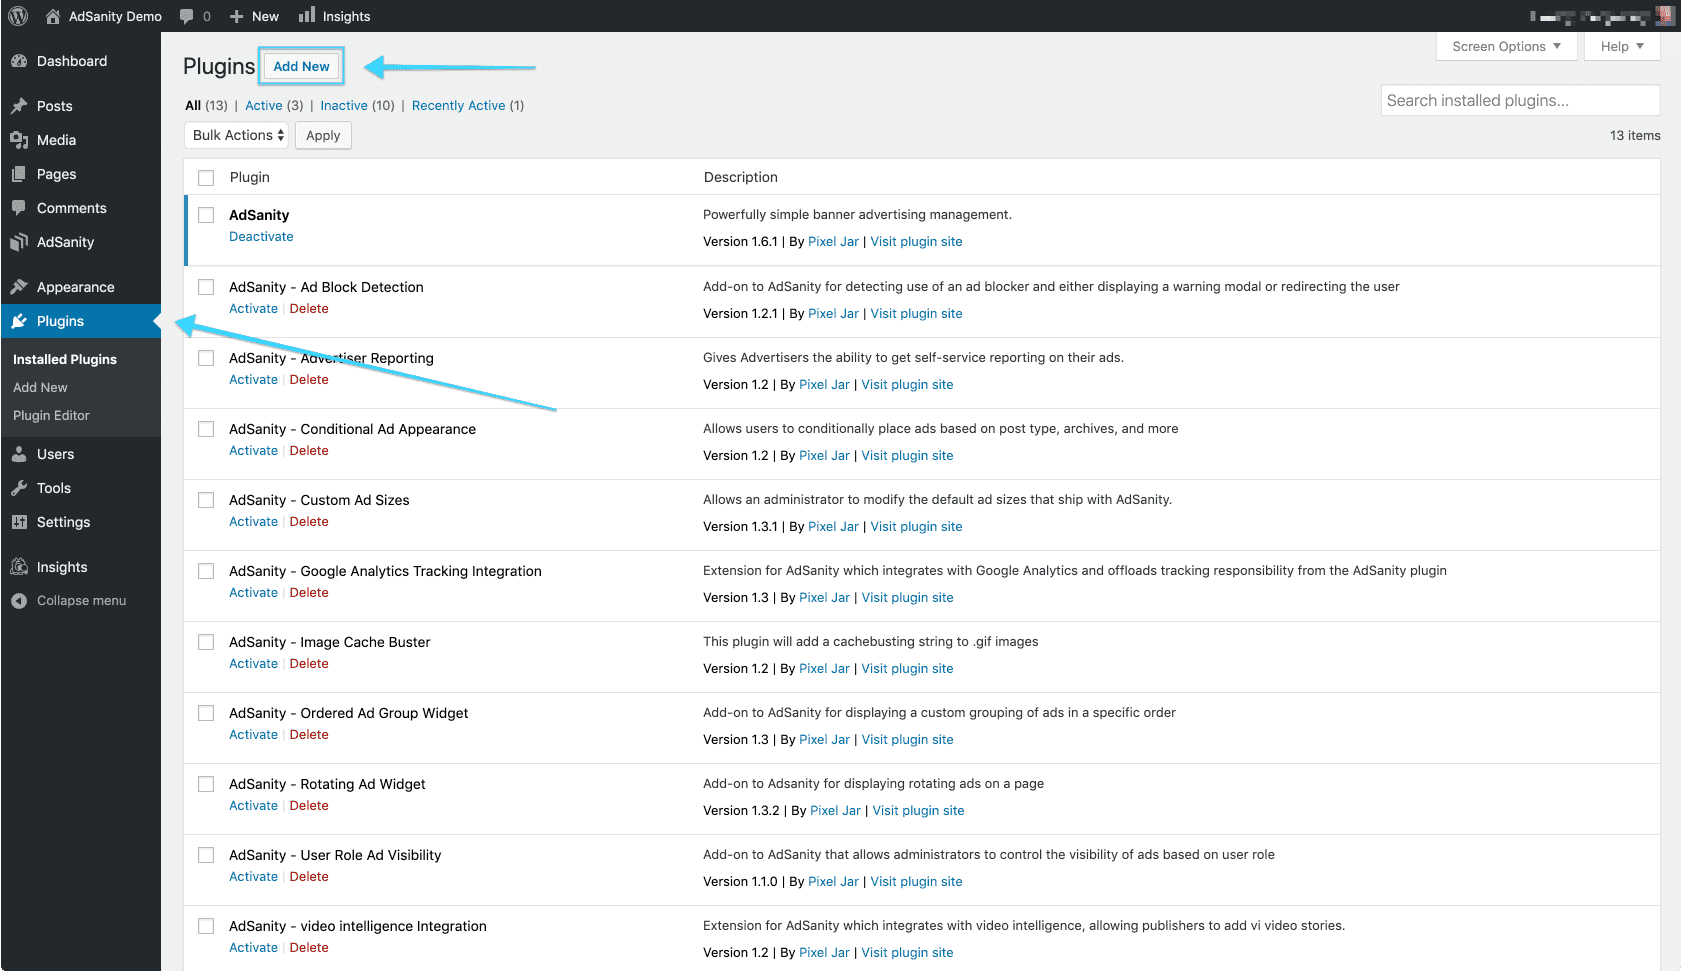
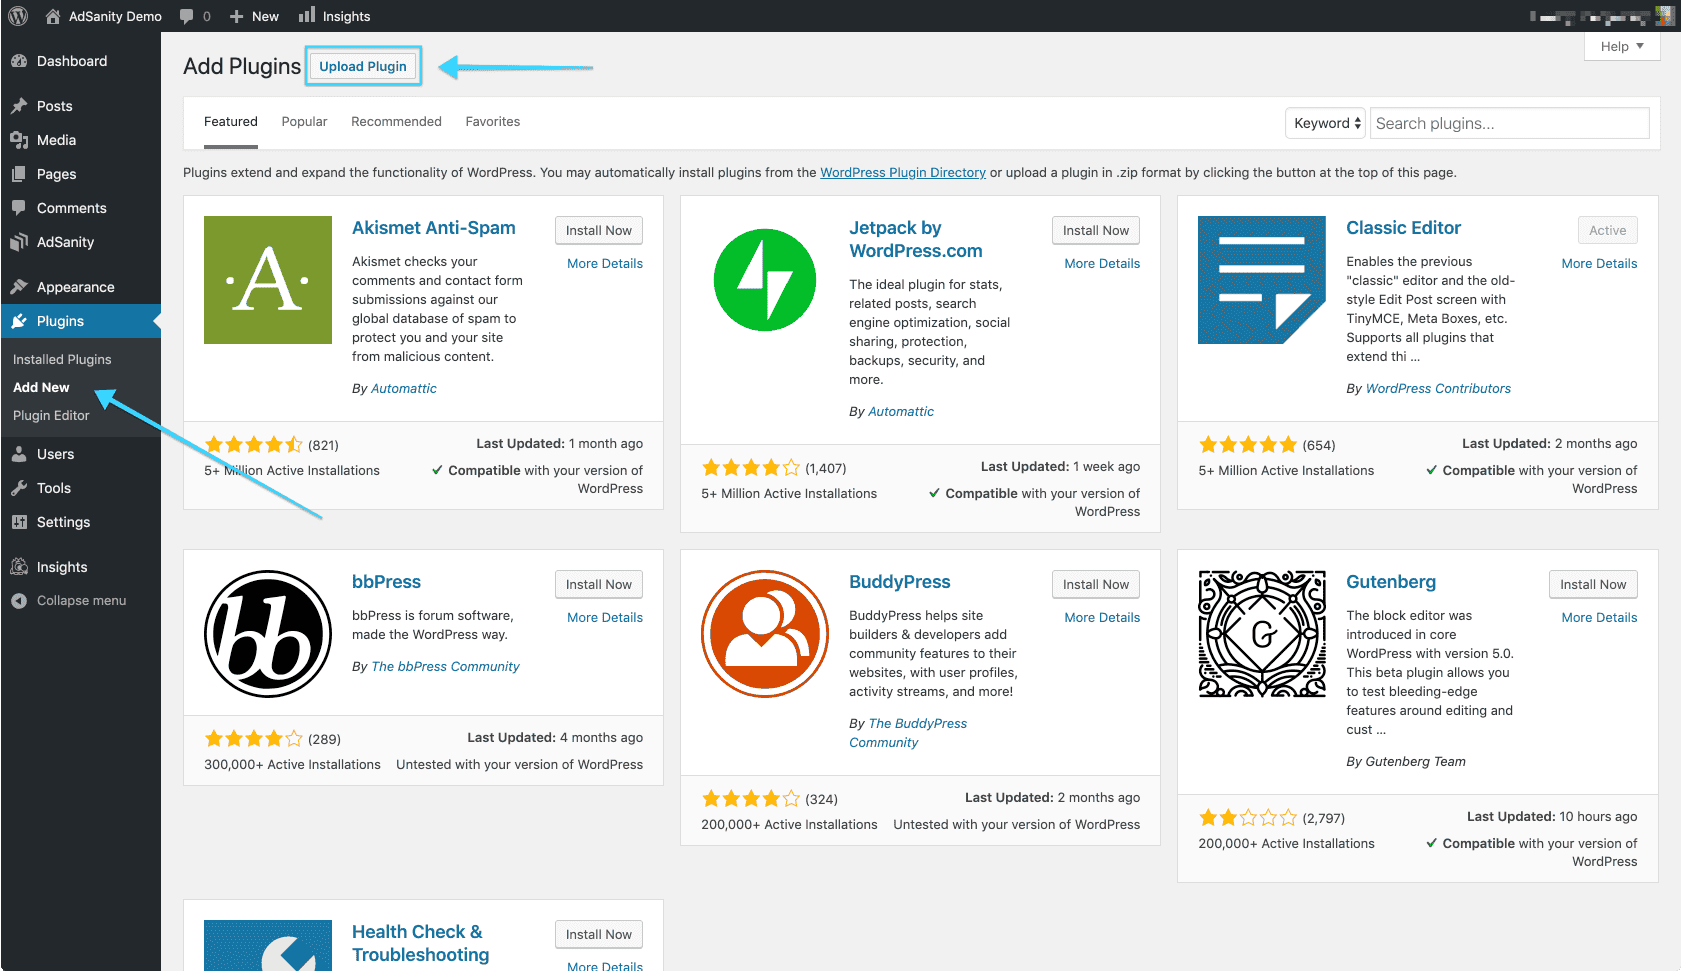
First, you’ll want to navigate to to the Plugins section of your dashboard. (fig. 1) From that page you’ll select “Add New” and then you will be sent to the Add Plugins page and you’ll see a listing of featured plugins. You’ll want to click on the “Upload Plugin” button at the top of the page. (fig. 2) You’ll then click “Choose File” and then select the zip file downloaded on the AdSanity plugin site and click on “Install Now.”
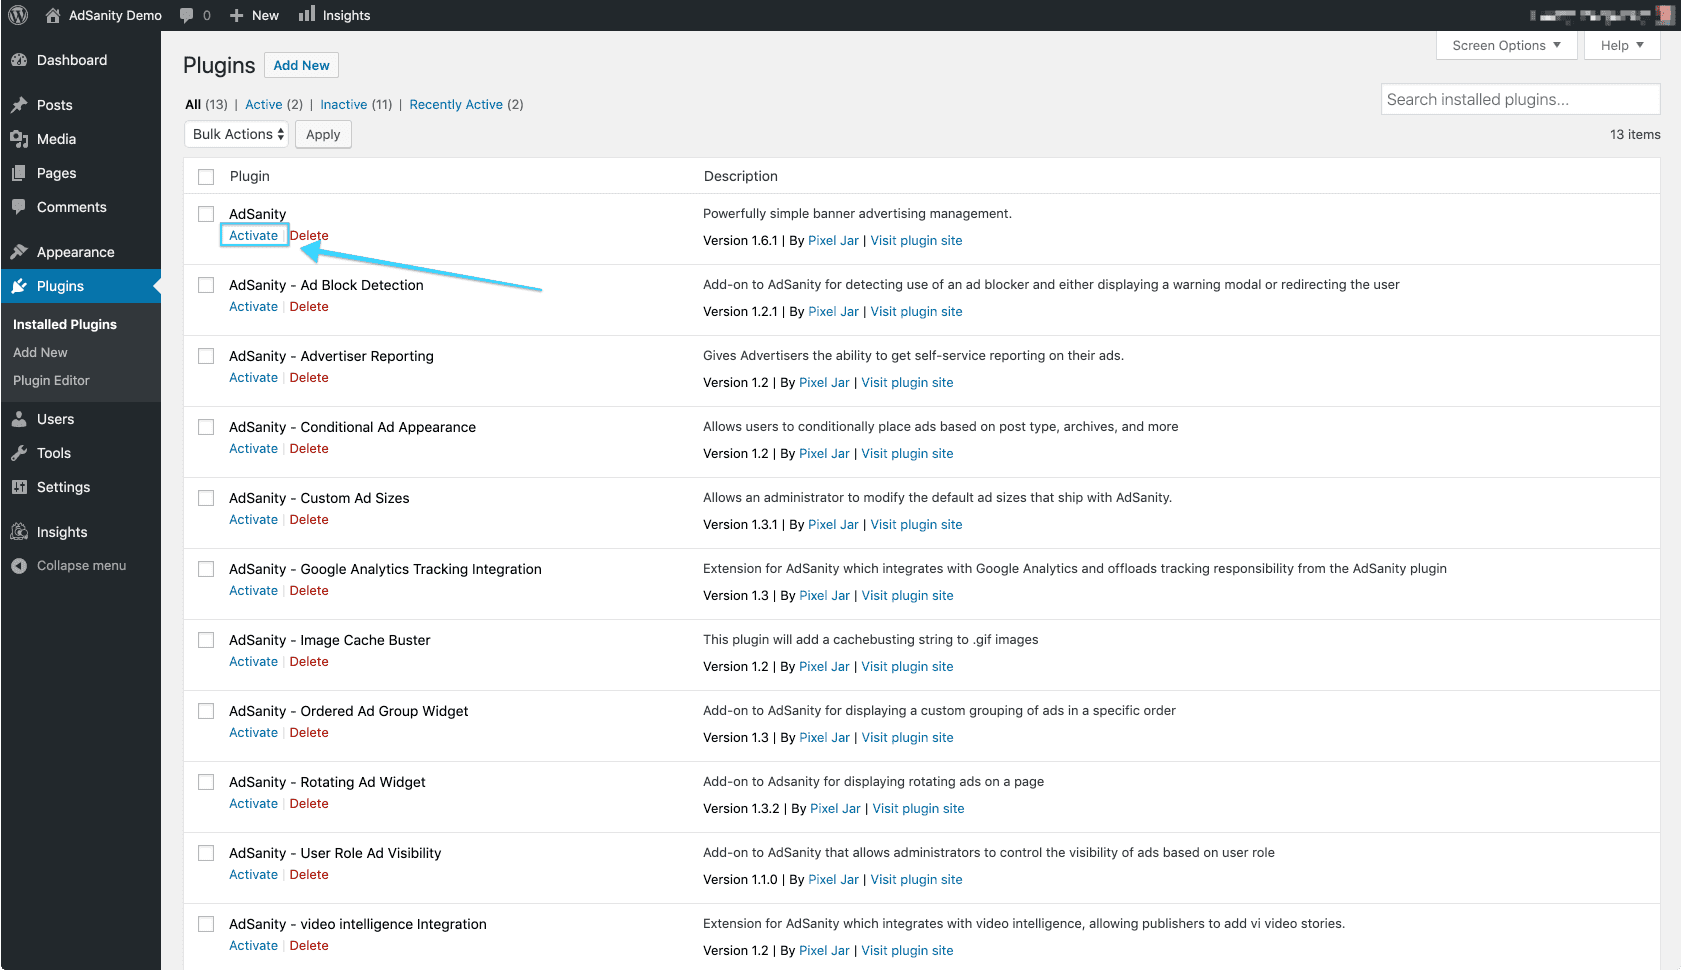
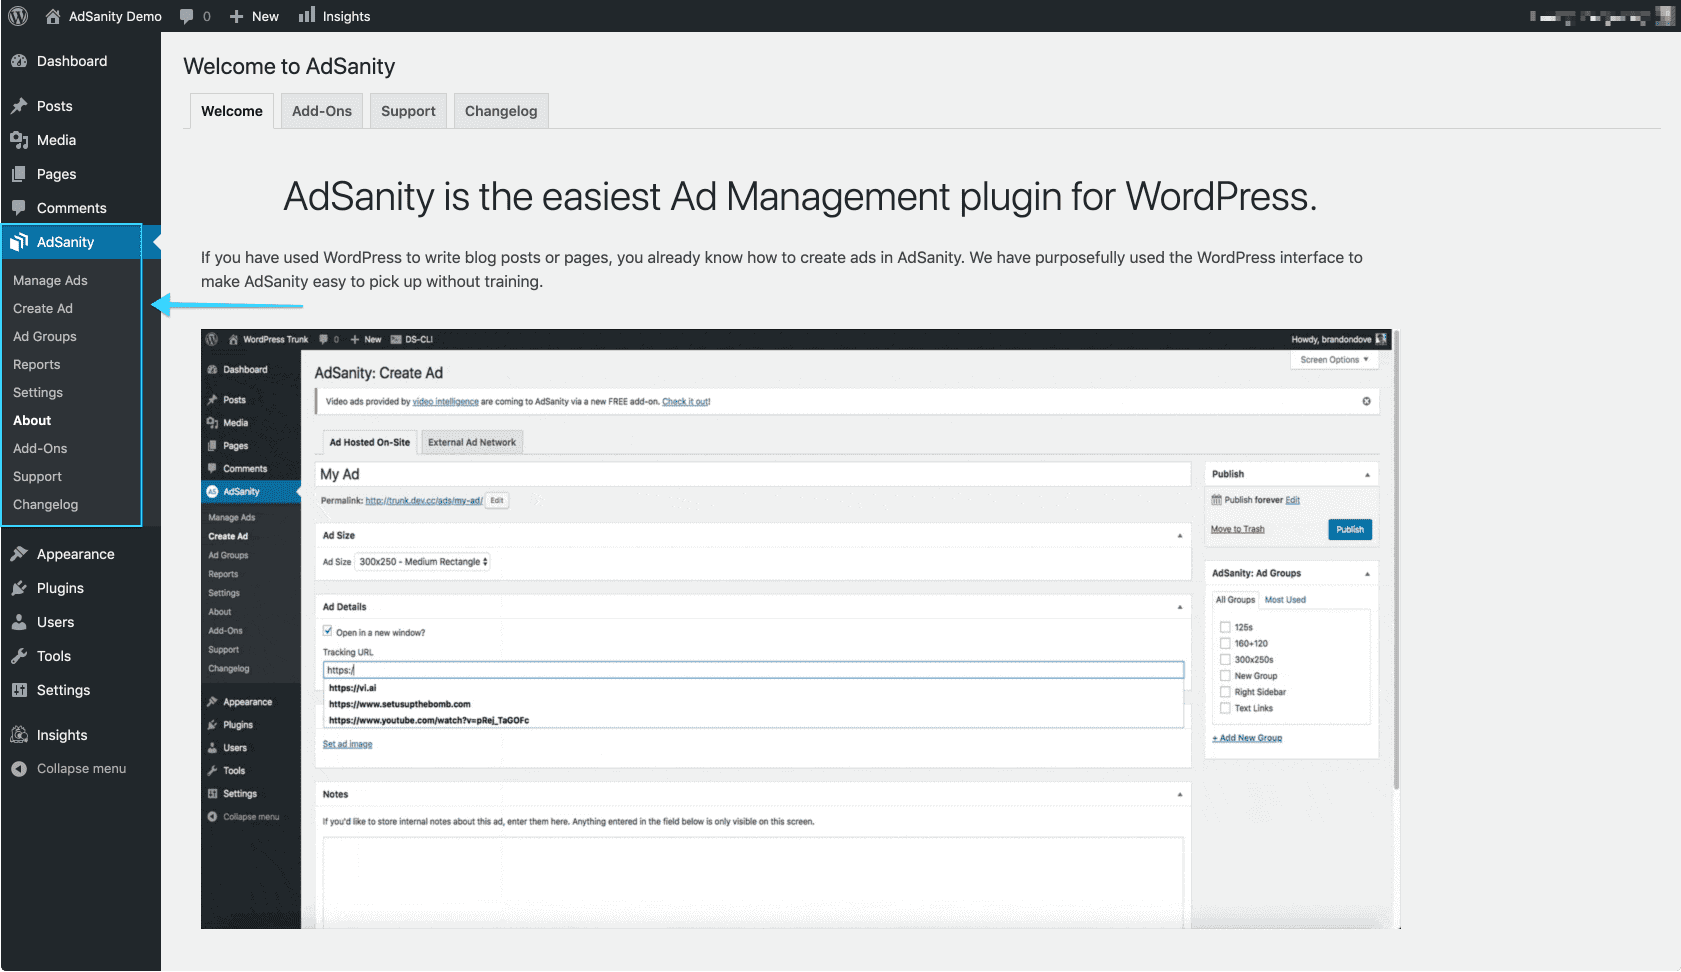
Once the plugin is installed (which should be a relatively quick process) you’ll be directed to the Installing Plugin from uploaded file page which will indicate the file you’ve uploaded. You should then click the “Activate Plugin” button to complete the installation. (fig. 3) After the plugin has been activated you will see an AdSanity section has been added to your dashboard and the plugin features are ready to use. (fig. 4)
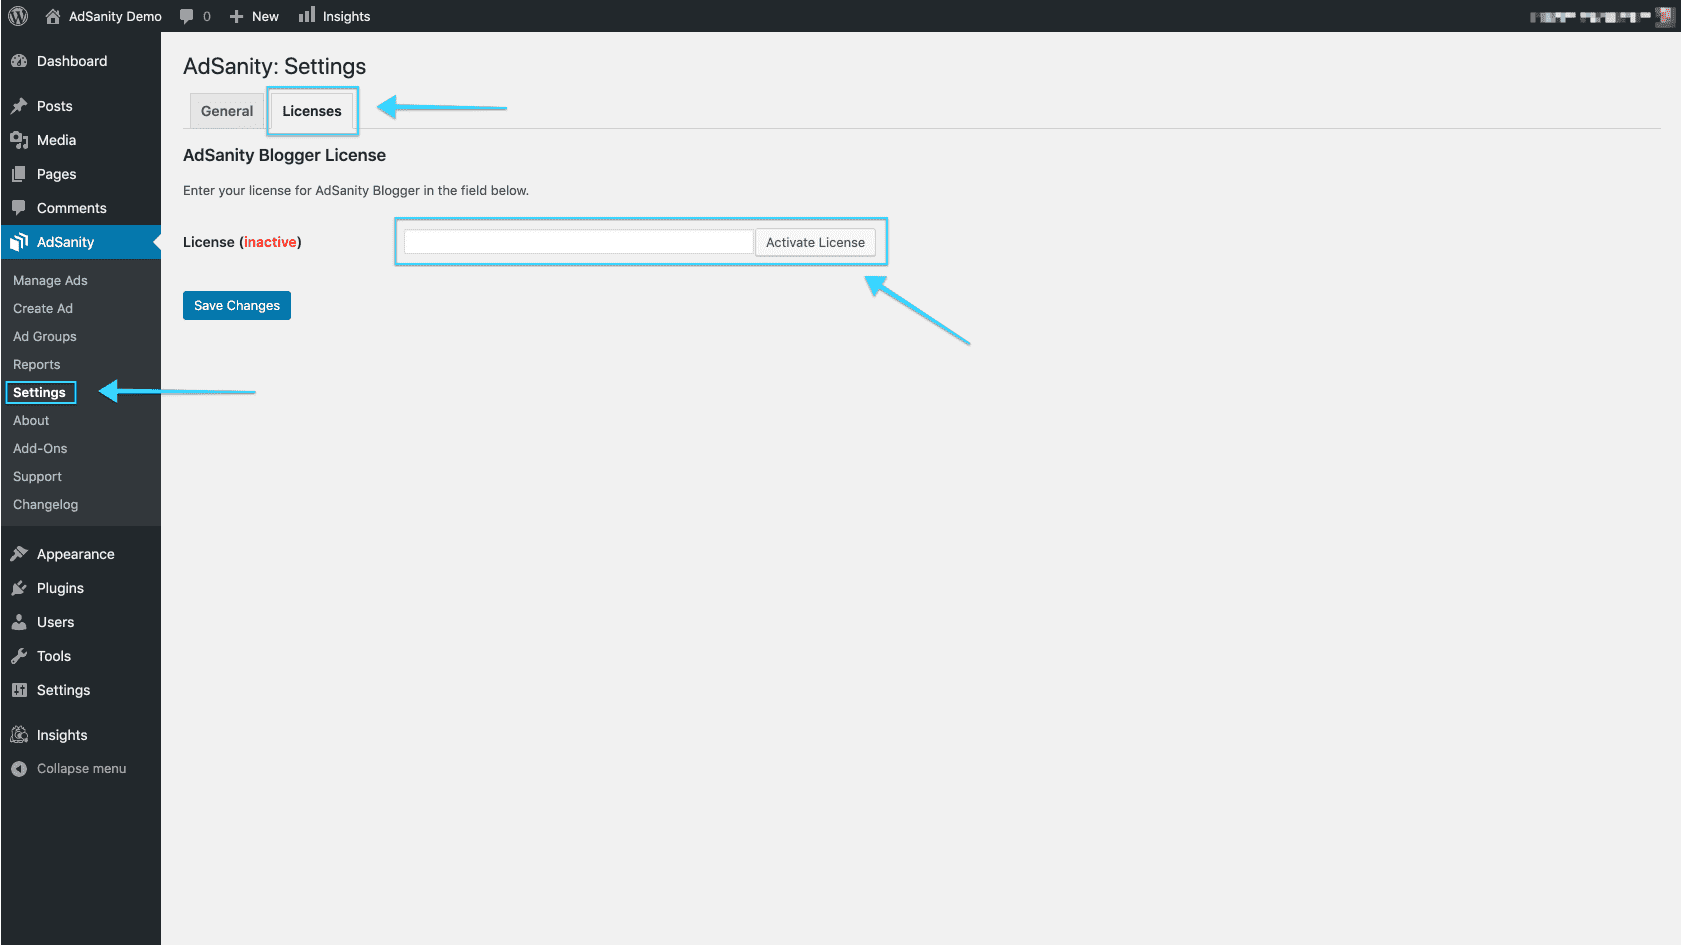
Como último paso, vaya a la página Configuración en la sección AdSanity del panel de control. Aquí puede introducir su clave de licencia en la pestaña Licencias de la página. (fig. 5) Esta licencia le fue enviada por correo electrónico en el momento de su compra o puede localizarla en la página de Confirmación de Compra en el sitio de AdSanity.
Didn’t find what you were looking for?
If you’re a subscriber to AdSanity and don’t find an answer to your specific question please submit a request and our support department will address your issue quickly.
