Creación de anuncios
Menú Guía ×Descargar
Once you have completed your purchase of your AdSanity license you’ll receive an email confirming your purchase with a link to your account where you’ll be able to download the AdSanity plugin.
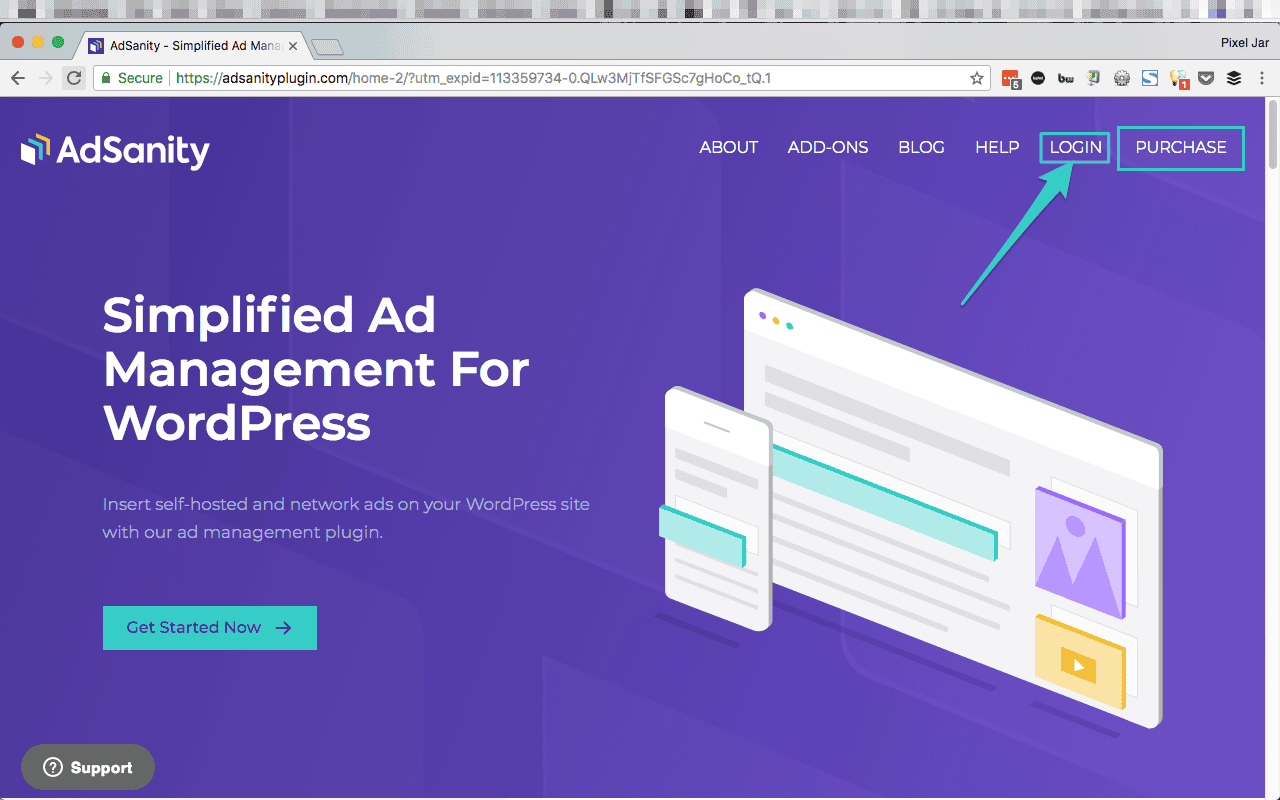
Should you misplace or delete that specific email you’re always able to log back into the AdSanity plugin site and download the latest version of AdSanity. The login for your account is located on the main menu of the website. (fig. 1)
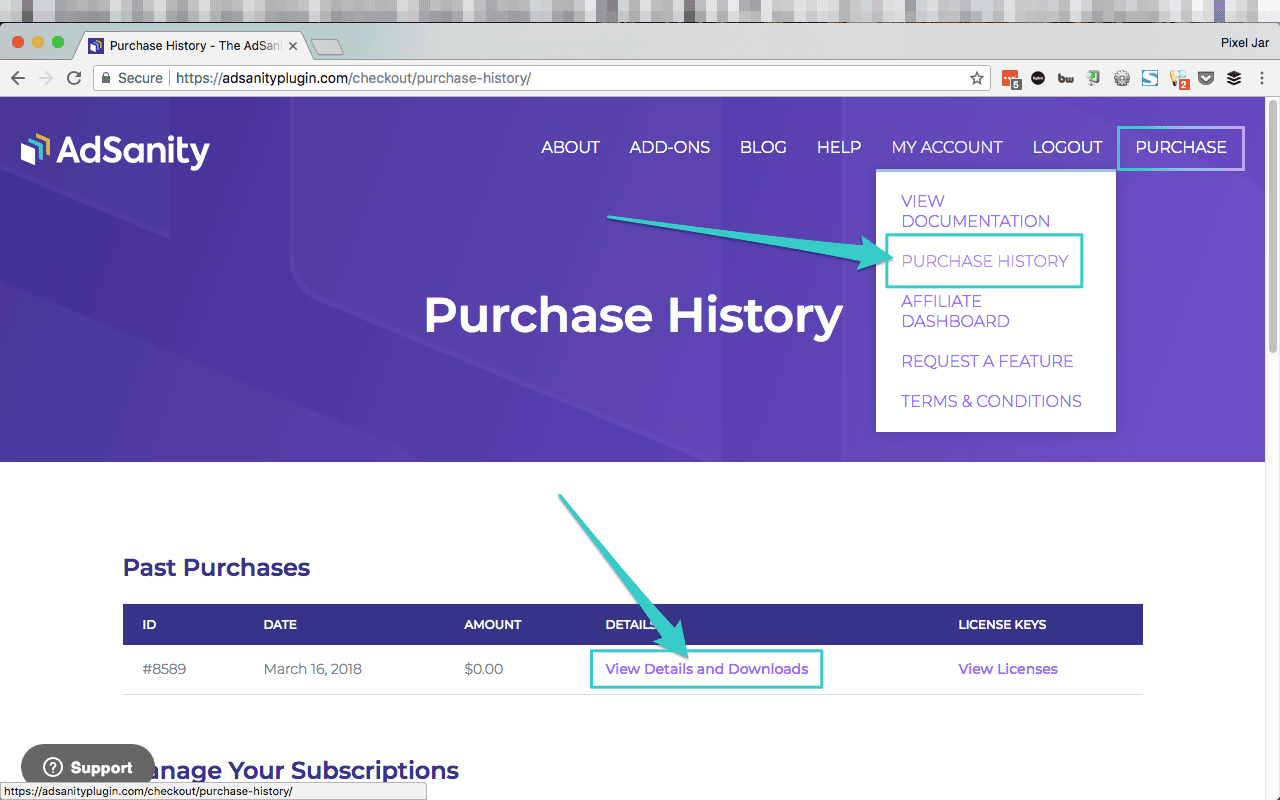
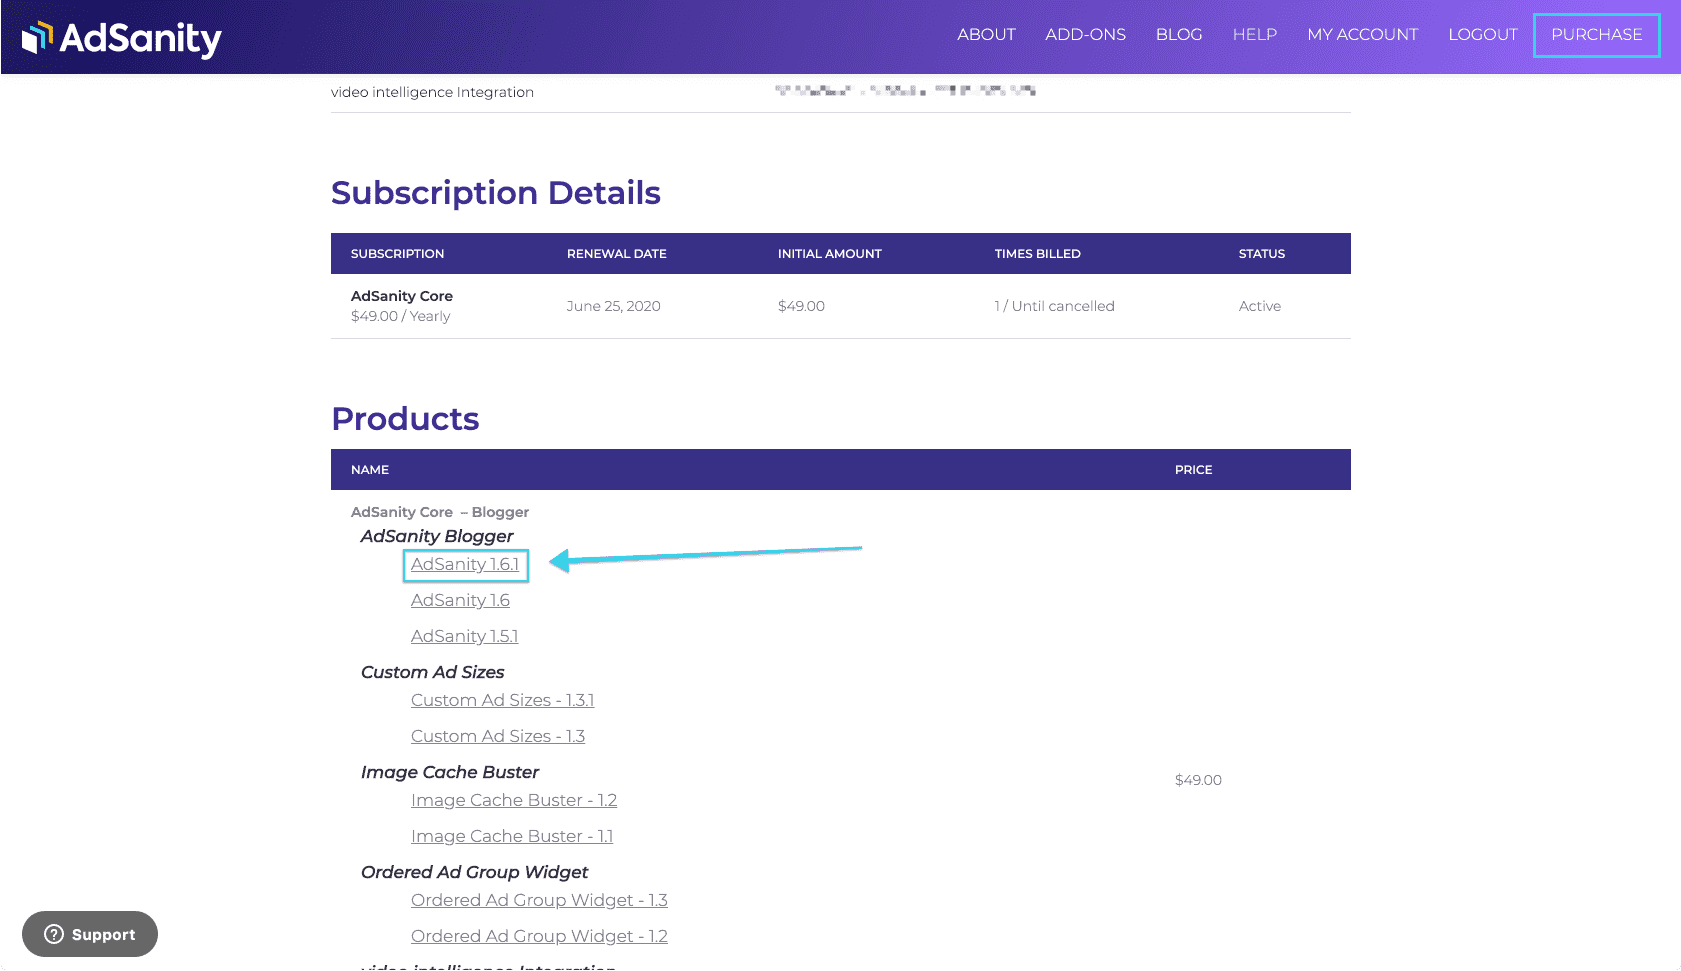
Once you’re logged in you should be viewing your Purchase History (fig. 2) and you can click on “View Details and Downloads” to click through to your Purchase Confirmation. On the Purchase Confirmation page (fig. 3) you can click the “AdSanity” link to start your download. Note that the AdSanity link (and in fact all download links) will include the version number of the download. You can also access any Basic or Pro Add-Ons that are associated with your account from this same location.
Instalación
Once you have the plugin downloaded it’s very easy to install the plugin. There are two primary methods of installing the plugin.
Puede instalar a través del panel de control o a través de FTP.
In addition, if you’re a developer you may be including your installed plugins in a repository for deployment to staging or production sites. There is nothing unique to the AdSanity installation that would prohibit this.
Cuadro de mandos
Instalar AdSanity no es diferente a instalar cualquier otro plugin desde el panel de control.
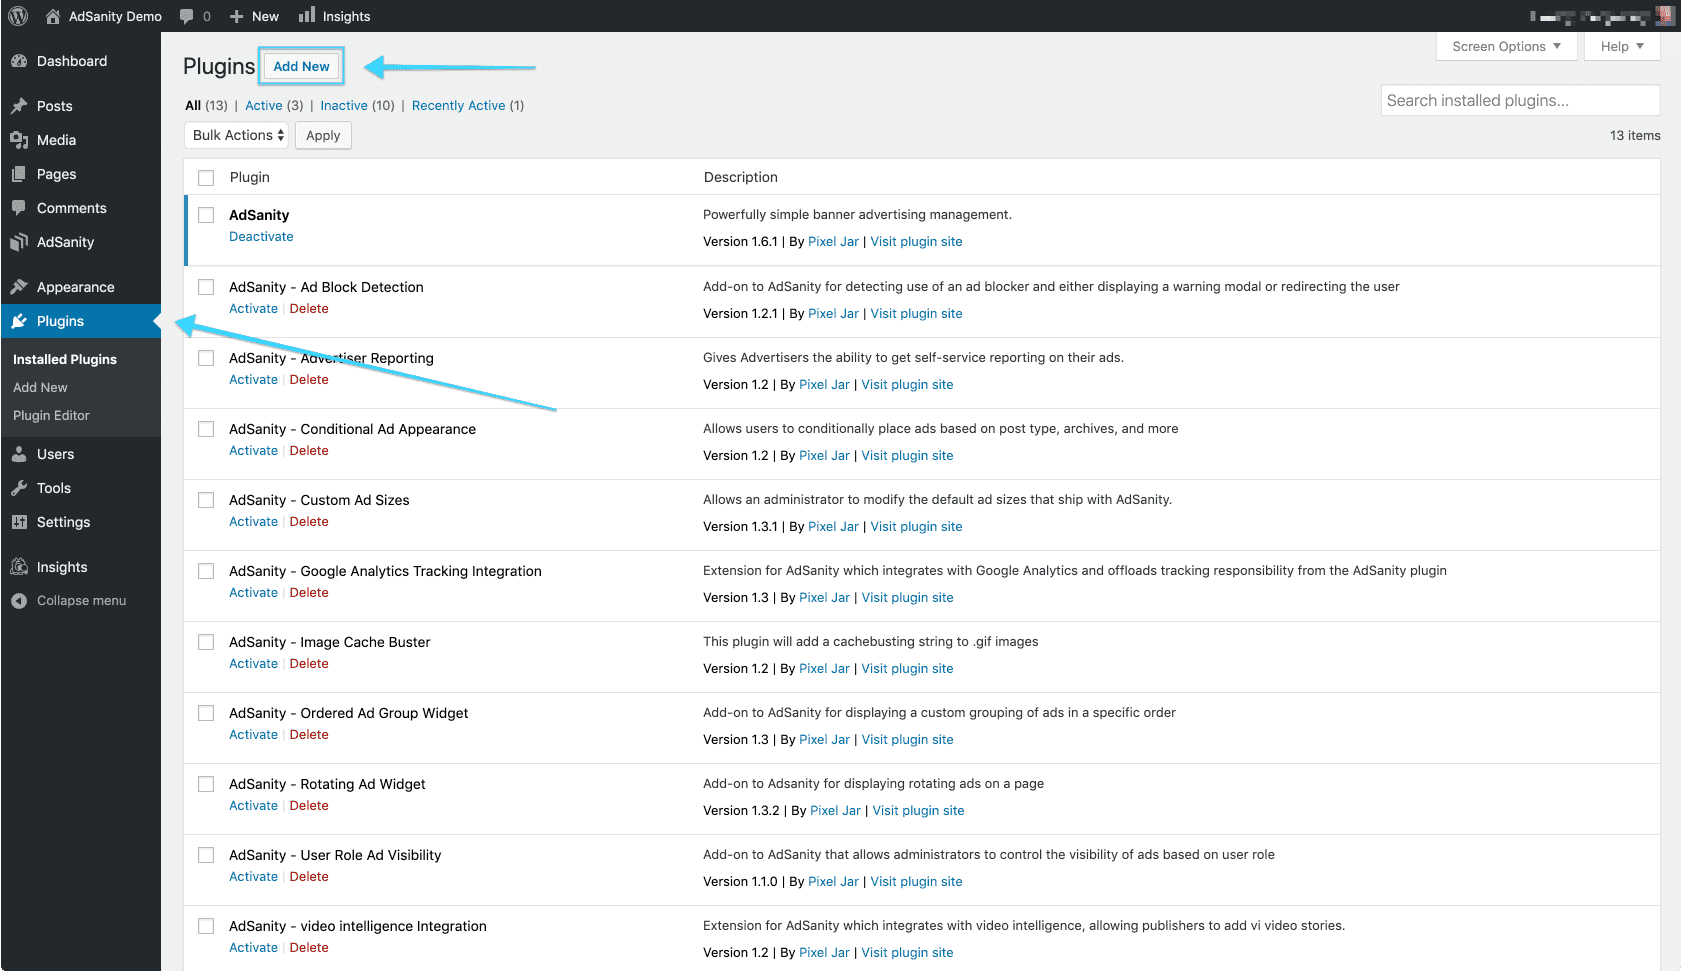
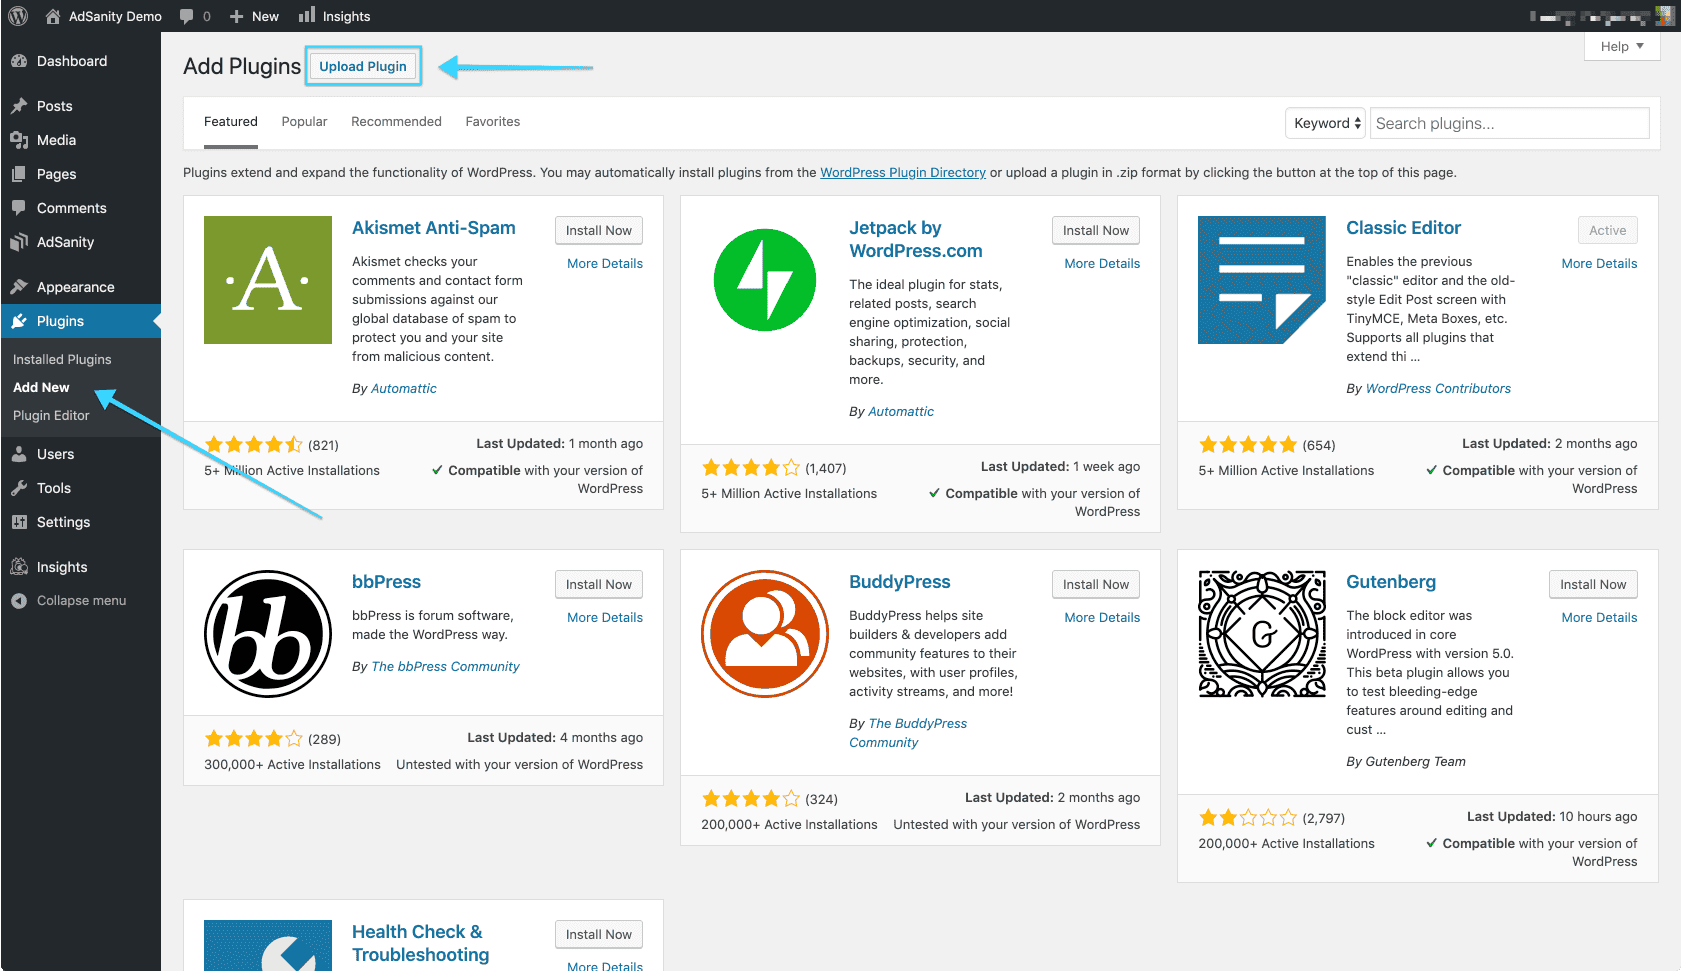
First, you’ll want to navigate to to the Plugins section of your dashboard. (fig. 1) From that page you’ll select “Add New” and then you will be sent to the Add Plugins page and you’ll see a listing of featured plugins. You’ll want to click on the “Upload Plugin” button at the top of the page. (fig. 2) You’ll then click “Choose File” and then to select the zip file that you downloaded from the AdSanity plugin site and click on “Install Now.”
Once the plugin is installed (which should be a relatively quick process) you’ll be directed to the Installing Plugin from uploaded file page which will indicate the file you’ve uploaded. You should then click the “Activate Plugin” button to complete the installation. (fig. 3) After the plugin has been activated you will see an AdSanity section has been added to your dashboard and the plugin features are ready to use. (fig. 4)


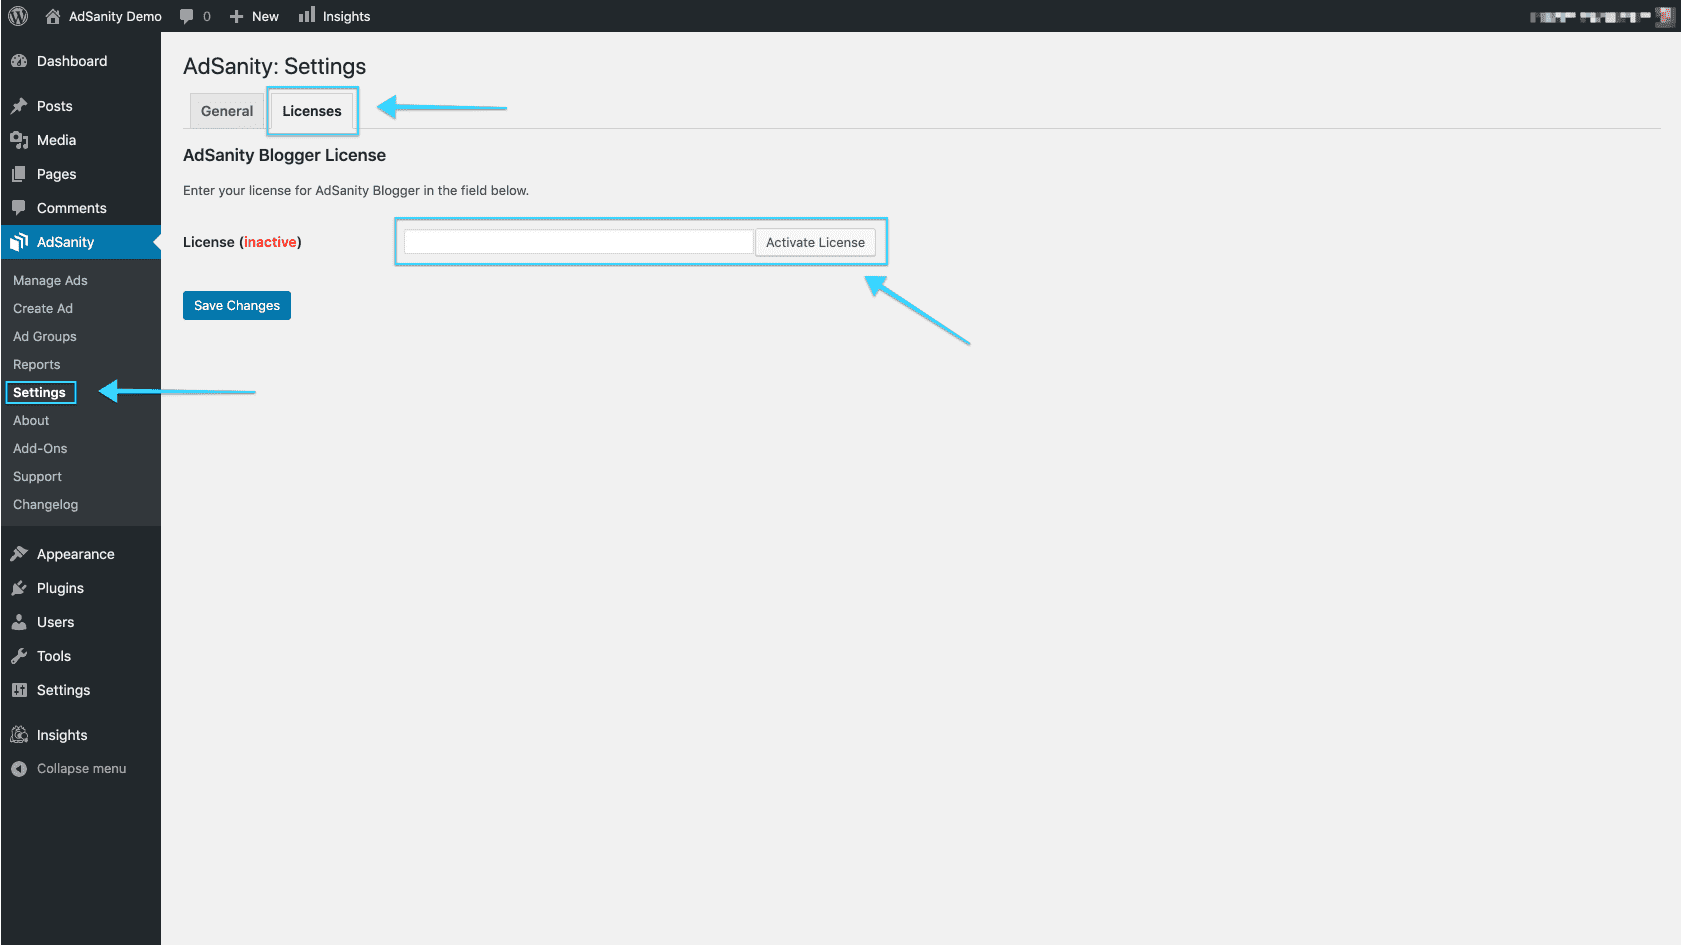
Como último paso, vaya a la página Configuración en la sección AdSanity del panel de control. Aquí puede introducir su clave de licencia en la pestaña Licencias de la página. (fig. 5) Esta licencia le fue enviada por correo electrónico en el momento de su compra o puede localizarla en la página de Confirmación de Compra en el sitio de AdSanity.
Instalación FTP
Many users prefer to add their plugins via FTP. FTP installation of AdSanity doesn’t differ from a normal FTP installation.
First, you’ll unzip the plugin that you downloaded from the AdSanity Plugin site. Be sure that the folder name is called “adsanity”. You’ll then connect to your website via FTP using the FTP client of your choice. The plugin folder should be uploaded to the plugins folder in the wp-content folder for your website.
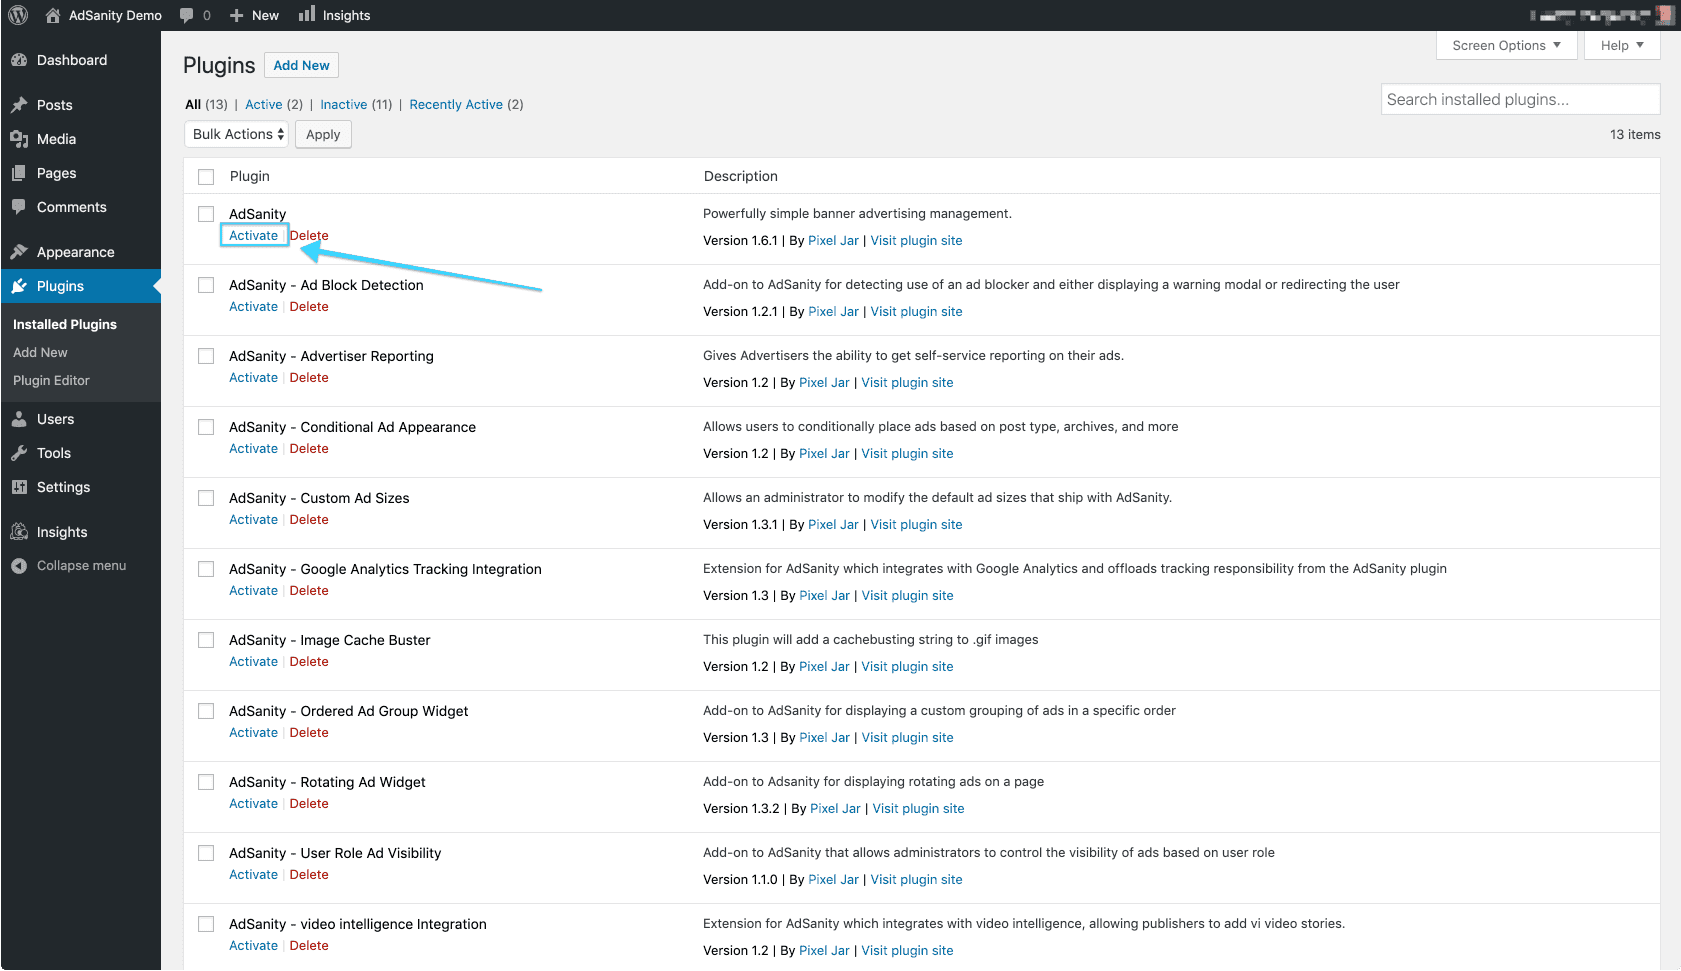
Once the plugin is installed you can return to your WordPress dashboard. Navigate to the Installed Plugins page. You should then click the “Activate” text beneath the AdSanity entry on the list of plugins to complete the installation. (fig. 1) After the plugin has been activated you will see an AdSanity section has been added to your dashboard and the plugin features are ready to use. (fig. 2)

Como último paso, vaya a la pestaña Licencia en la página Configuración de la sección AdSanity del panel de control. Aquí puede introducir su clave de licencia. (fig. 3) Esta clave le fue enviada por correo electrónico en el momento de su compra o se puede encontrar en la página de Confirmación de Compra en el sitio de AdSanity.

Actualización de AdSanity desde versiones anteriores
Actualizar AdSanity es fácil, pero si tiene instalada una versión anterior es posible que no disponga de las actualizaciones automáticas que ahora forman parte del plugin.
Las actualizaciones automáticas se modificaron en la versión 1.1 de AdSanity, por lo que si tiene una versión anterior, es posible que le preocupen los datos de sus anuncios.
Puede desactivar y eliminar de forma segura el plugin heredado. Los datos de sus anuncios se almacenan de forma segura en su base de datos. A continuación, puede instalar la nueva versión de AdSanity y sus anuncios y datos de seguimiento de clics estarán intactos.
AdSanity cambió la forma en que maneja el tráfico de fuentes fraudulentas como bots o spiders. Estos datos ya no se recogen de la misma manera y se purgan de la base de datos cuando se instala la nueva versión de AdSanity.
Didn’t find what you were looking for?
If you’re a subscriber to AdSanity and don’t find an answer to your specific question please submit a request and our support department will address your issue quickly.
