Expiração do anúncio
Menu GuiaVisão geral
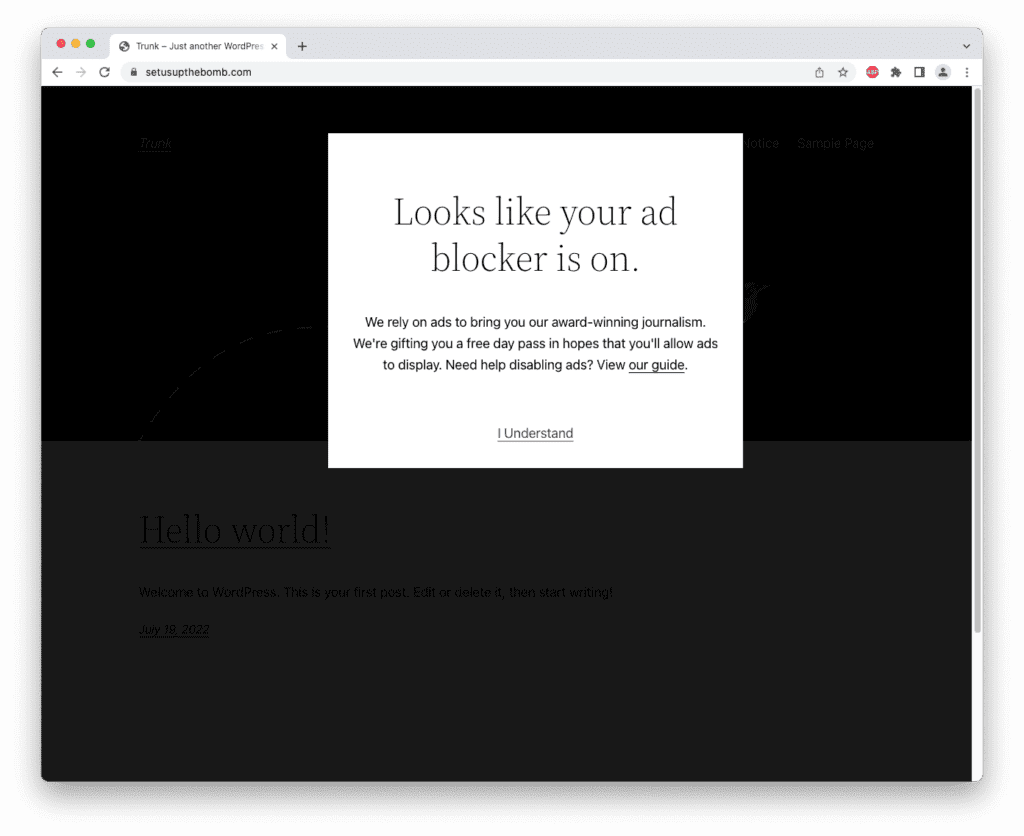
O AdSanity Detection Add-On permite que o administrador do AdSanity dê feedback aos visitantes dos seus sítios Web alimentados pelo AdSanity que estejam a executar um bloqueador de anúncios no seu navegador.

Se tiver algum problema com este suplemento, não se esqueça de actualizar a versão mais recente deste suplemento, bem como o núcleo do AdSanity. Se não vir nenhuma actualização no seu painel de controlo do WordPress, pode sempre descarregar a mais recente a partir da nossa página Histórico de Compras.
Requisitos adicionais: Todos os Add-Ons requerem a versão mais recente do AdSanity Core.
Página de Definições de Detecção de Blocos de Anúncio
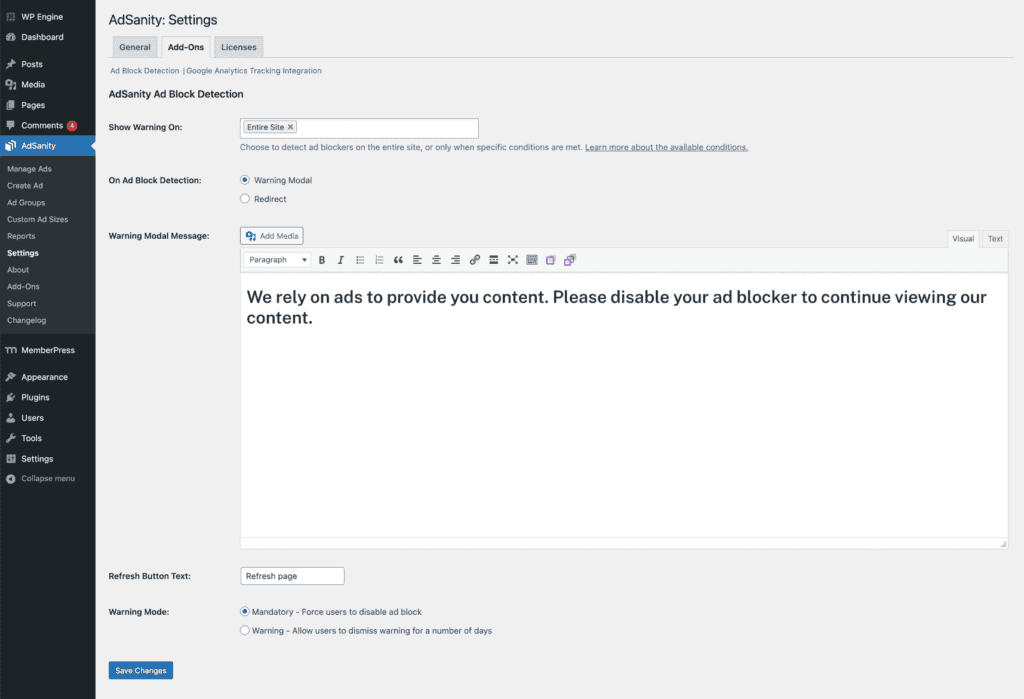
A configuração para este suplemento é feita na página de configurações do AdSanity. Para aceder a estas configurações, navegar para o menu AdSanity no tablier do WordPress, e clicar no item do submenu Configurações. Quando chegar à página Configurações Gerais para AdSanity, verá separadores no topo da página. Clique no separador "Add-Ons" para configurar o seu add-on. Dependendo dos add-ons do AdSanity que tiver activado, poderá ver os nomes dos mesmos sob os separadores quando chegar à página de definições de add-ons. Ao clicar no link "Detecção de Bloco de Anúncios", irá levá-lo às definições de Detecção de Bloco de Anúncios.

Mostrar Aviso Ligado
This setting allows you to choose which types of content will trigger the warning message. The default will be for the Entire Site to show the warning if an ad blocker is detected. Clicking on the field will show you the available condition options. Selecting one of these options can limit the ad block detection to specific areas of your site using Conditional Tags. You can find more details about Conditional Tags on the WordPress site. To remove a condition, simply click the “x” next to the post type.
Sobre a detecção de blocos de anúncios
Tem duas formas de se dirigir aos visitantes com um bloqueador de anúncios activo. A primeira é exibir um Modal de Alerta. Esta opção exibirá uma mensagem num modal. A segunda opção é redireccionar o visitante para uma página específica no seu sítio. Dependendo da sua selecção aqui, terá mais algumas opções relacionadas.
Advertência Modal
Ao optar por exibir um modal, terá a capacidade de elaborar uma mensagem que explicará a sua necessidade de anúncios para gerar receitas, de modo a poder continuar a criar um grande conteúdo. Adicionalmente, poderá alterar o texto do botão que será exibido por baixo da sua mensagem.
Redireccionar
Ao escolher redireccionar visitantes com um bloqueador de anúncios activo para outra página do seu sítio, escolherá primeiro para que página os redireccionará. Em seguida, introduzirá o texto desejado em que gostaria que o visitante clicasse para o reencaminhar para a página anterior, uma vez desactivado o bloqueador de anúncios.
Modo de Alerta
A configuração final é determinar o grau de rigidez que deseja ter em relação ao seu pedido aos seus visitantes. Temos dois modos à sua escolha. Por defeito, o suplemento é definido para o modo "Obrigatório". No modo "Obrigatório", um utilizador será obrigado a desactivar o seu bloqueador de anúncios antes de poder ler o seu conteúdo sem ser interrompido. Se o utilizador não desligar o seu bloqueador de anúncios, continuará a ver avisos com cada pedido ao seu sítio. O segundo modo é o modo "Advertência". Ao seleccionar este modo, um utilizador verá o seu aviso e depois poderá rejeitá-lo por um número de dias. O número de dias é configurável no campo que aparece quando se selecciona este modo.
Uma vez terminadas as alterações às suas definições, clique no botão Guardar Alterações na parte inferior.
Didn’t find what you were looking for?
If you’re a subscriber to AdSanity and don’t find an answer to your specific question please submit a request and our support department will address your issue quickly.
SubmeterDidn’t find what you were looking for?
If you’re a subscriber to AdSanity and don’t find an answer to your specific question please submit a request and our support department will address your issue quickly.


