Créer des annonces
Guide Menu ×Téléchargement de
Once you have completed your purchase of your AdSanity license you’ll receive an email confirming your purchase with a link to your account where you’ll be able to download the AdSanity plugin.
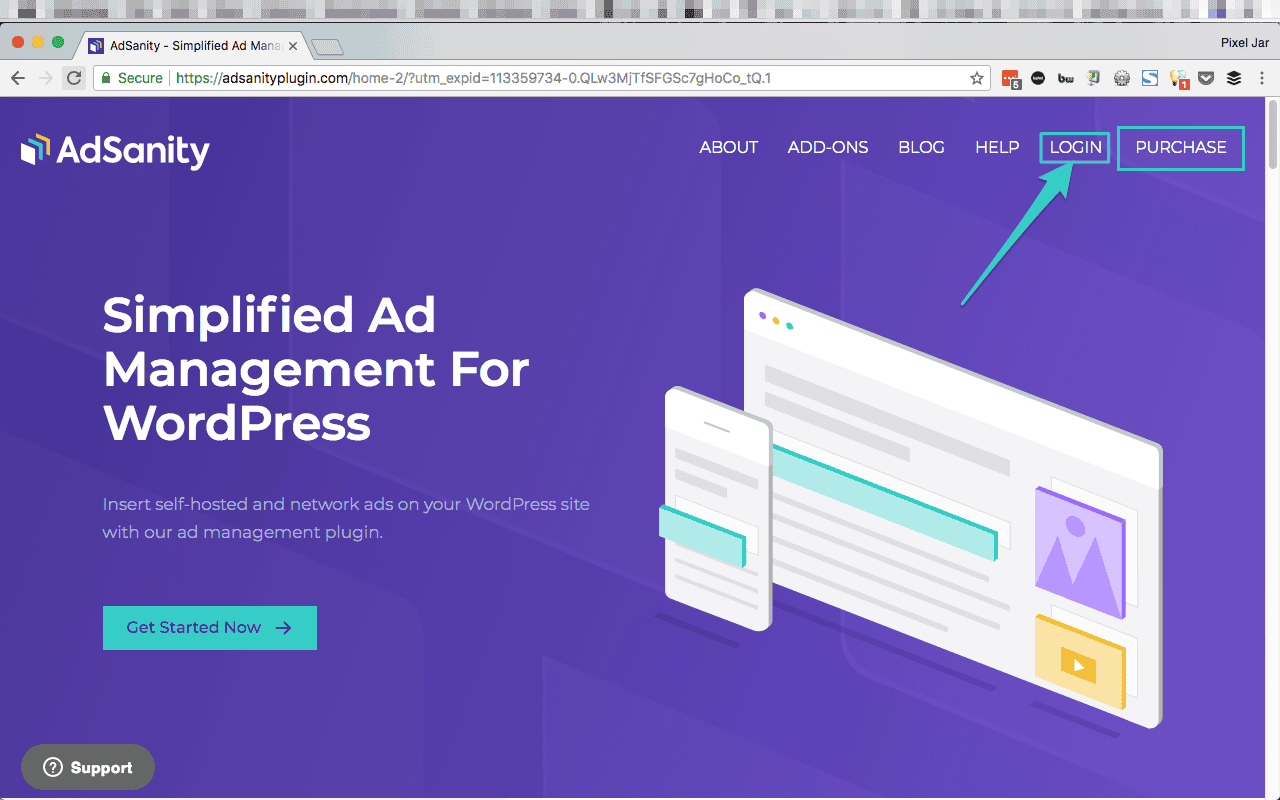
Should you misplace or delete that specific email you’re always able to log back into the AdSanity plugin site and download the latest version of AdSanity. The login for your account is located on the main menu of the website. (fig. 1)
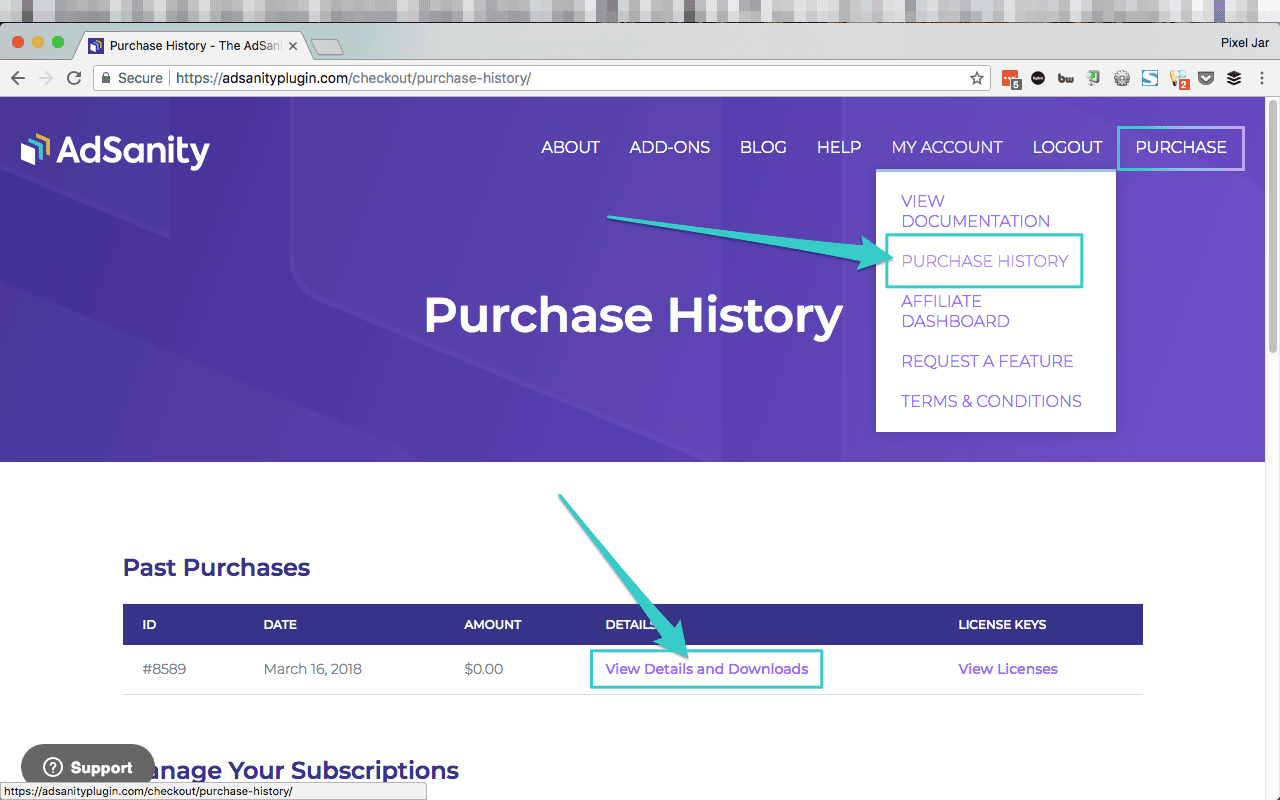
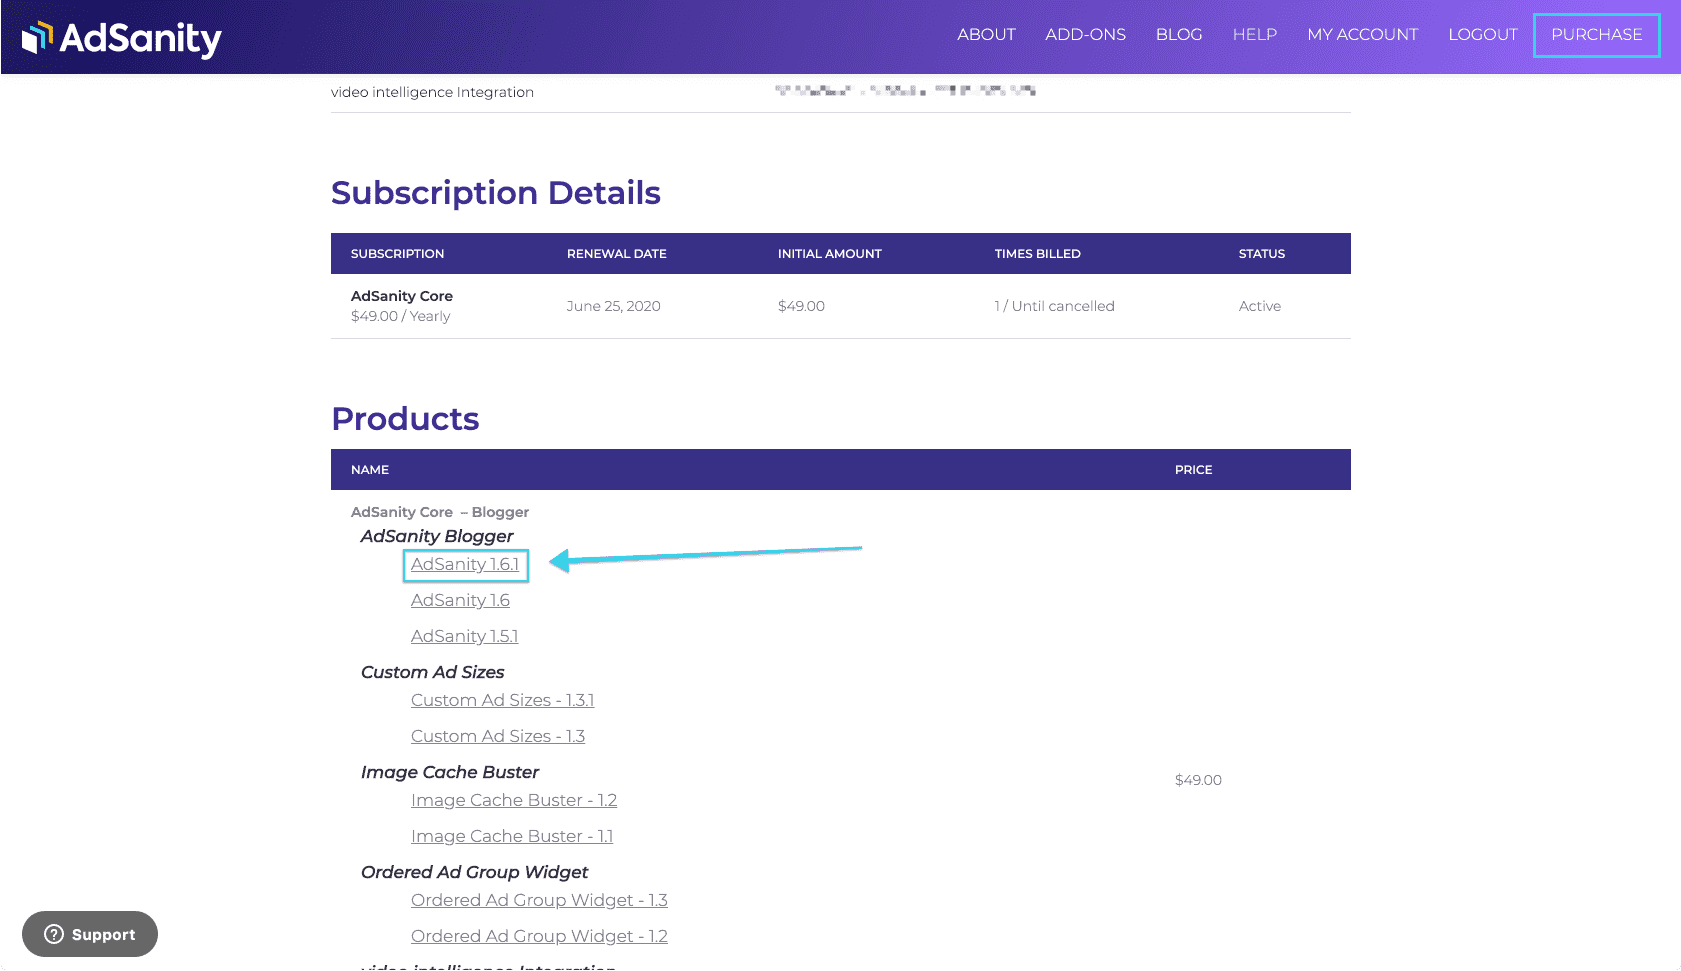
Once you’re logged in you should be viewing your Purchase History (fig. 2) and you can click on “View Details and Downloads” to click through to your Purchase Confirmation. On the Purchase Confirmation page (fig. 3) you can click the “AdSanity” link to start your download. Note that the AdSanity link (and in fact all download links) will include the version number of the download. You can also access any Basic or Pro Add-Ons that are associated with your account from this same location.
Installation
Once you have the plugin downloaded it’s very easy to install the plugin. There are two primary methods of installing the plugin.
Vous pouvez installer via le tableau de bord ou via FTP.
In addition, if you’re a developer you may be including your installed plugins in a repository for deployment to staging or production sites. There is nothing unique to the AdSanity installation that would prohibit this.
Tableau de bord
L'installation d'AdSanity n'est pas différente de l'installation de tout autre plugin à partir du tableau de bord.
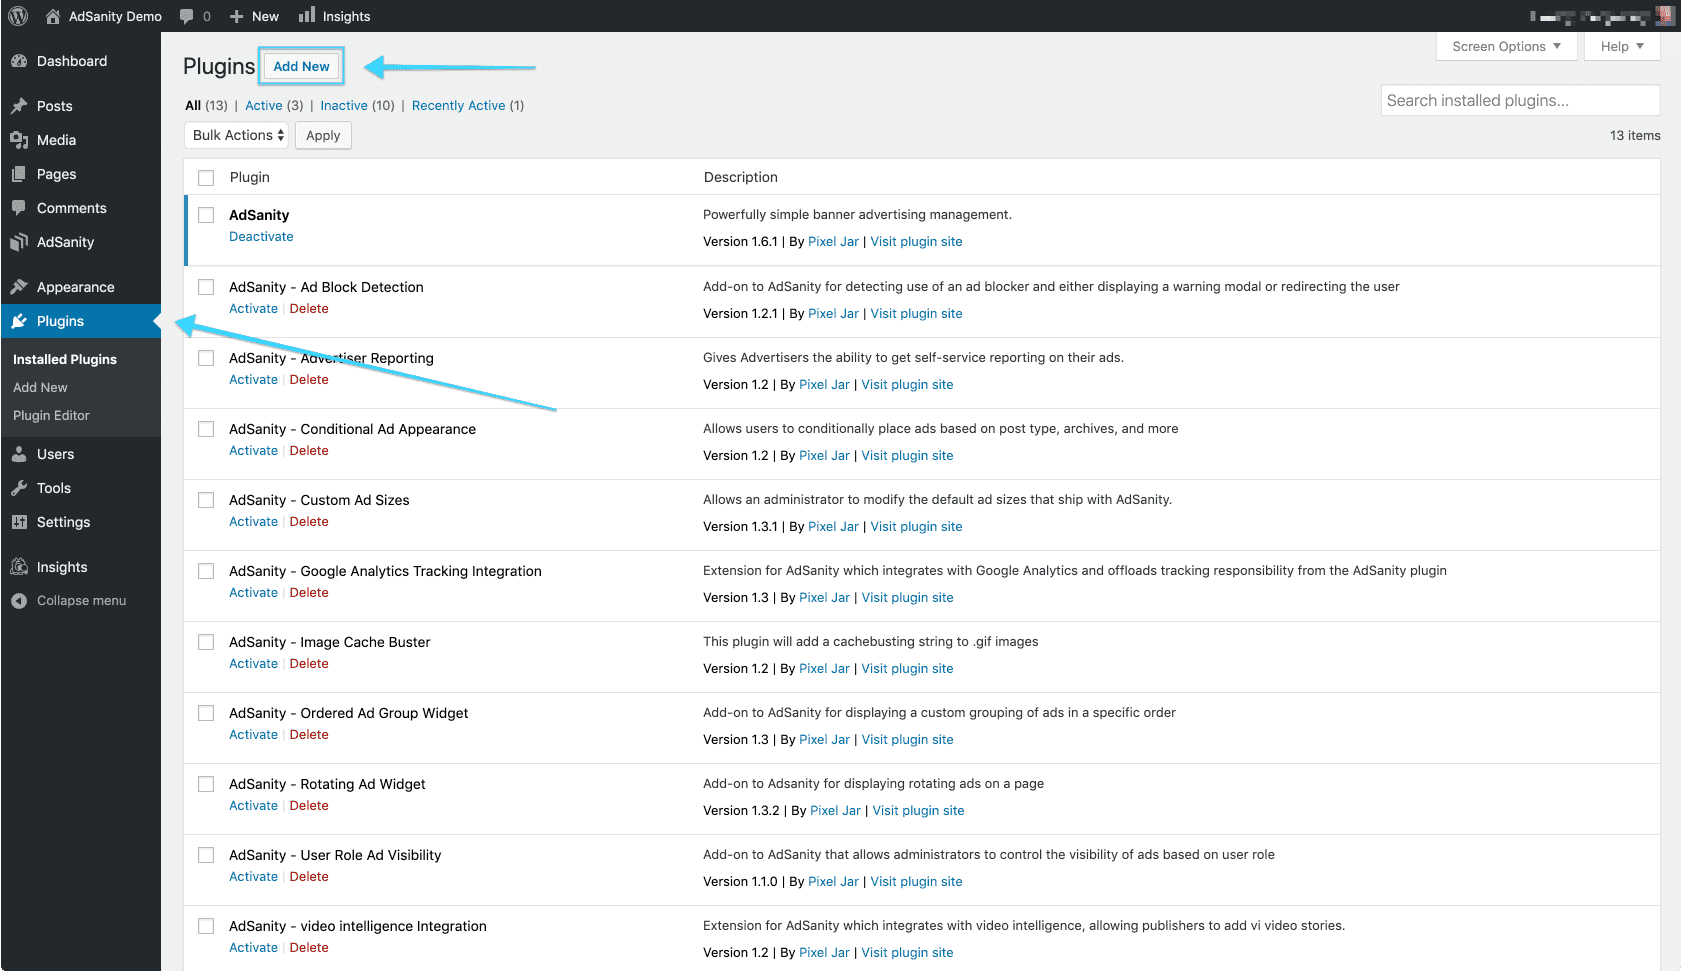
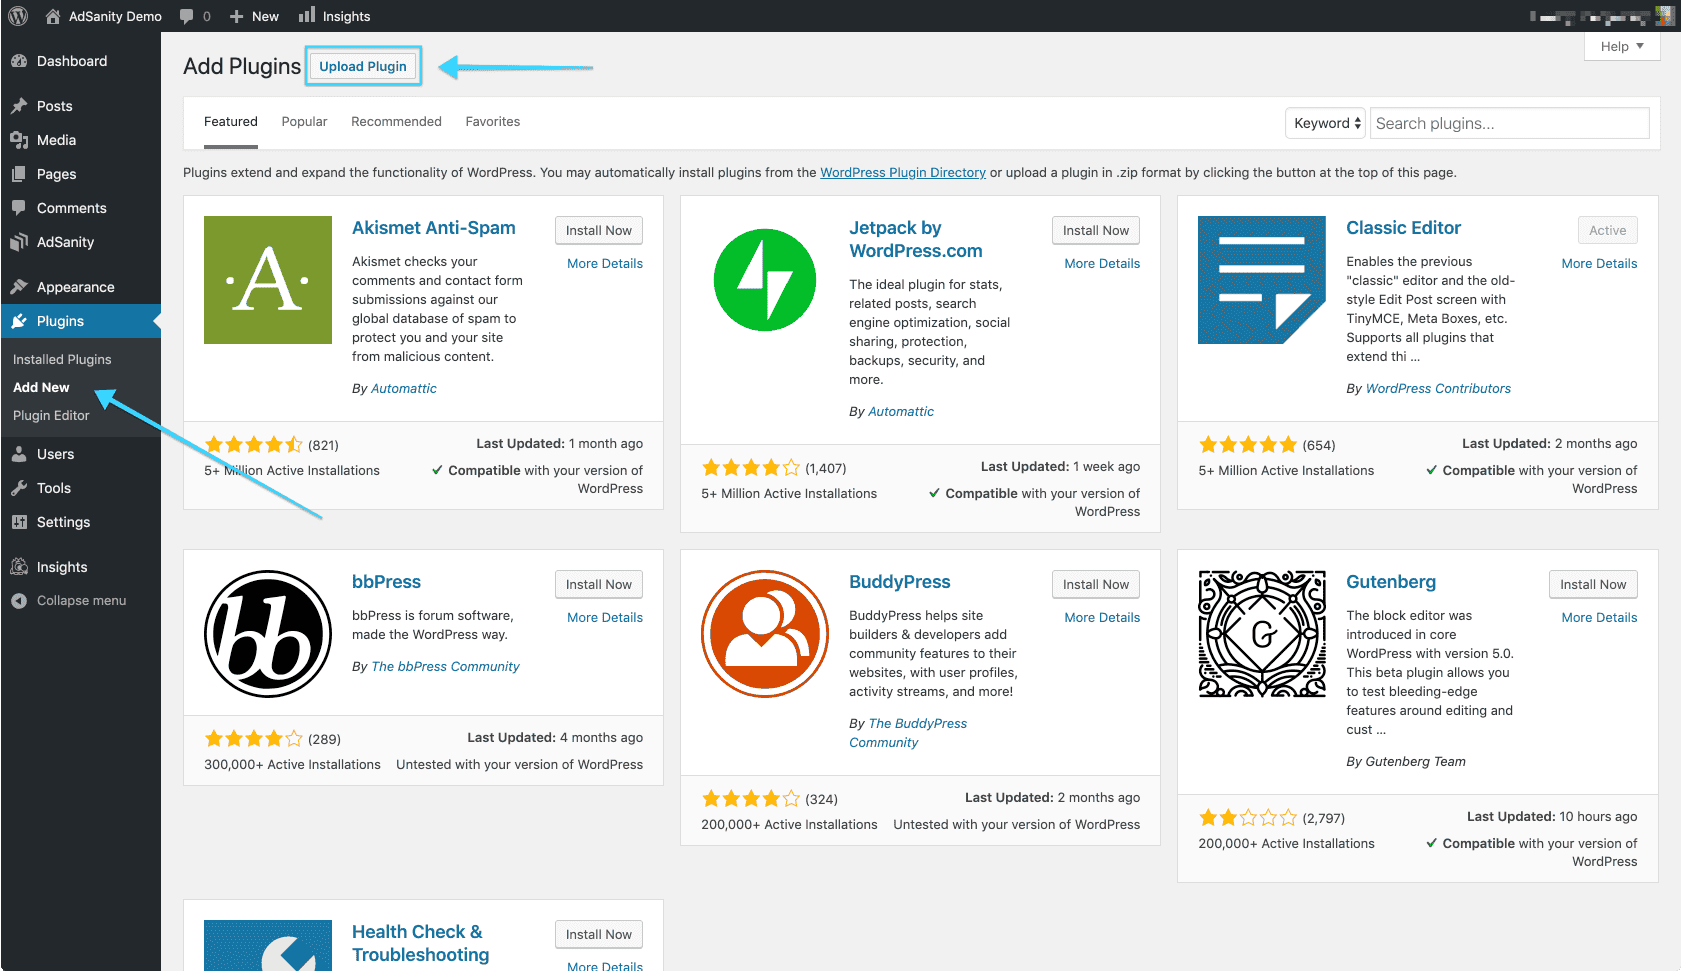
First, you’ll want to navigate to to the Plugins section of your dashboard. (fig. 1) From that page you’ll select “Add New” and then you will be sent to the Add Plugins page and you’ll see a listing of featured plugins. You’ll want to click on the “Upload Plugin” button at the top of the page. (fig. 2) You’ll then click “Choose File” and then to select the zip file that you downloaded from the AdSanity plugin site and click on “Install Now.”
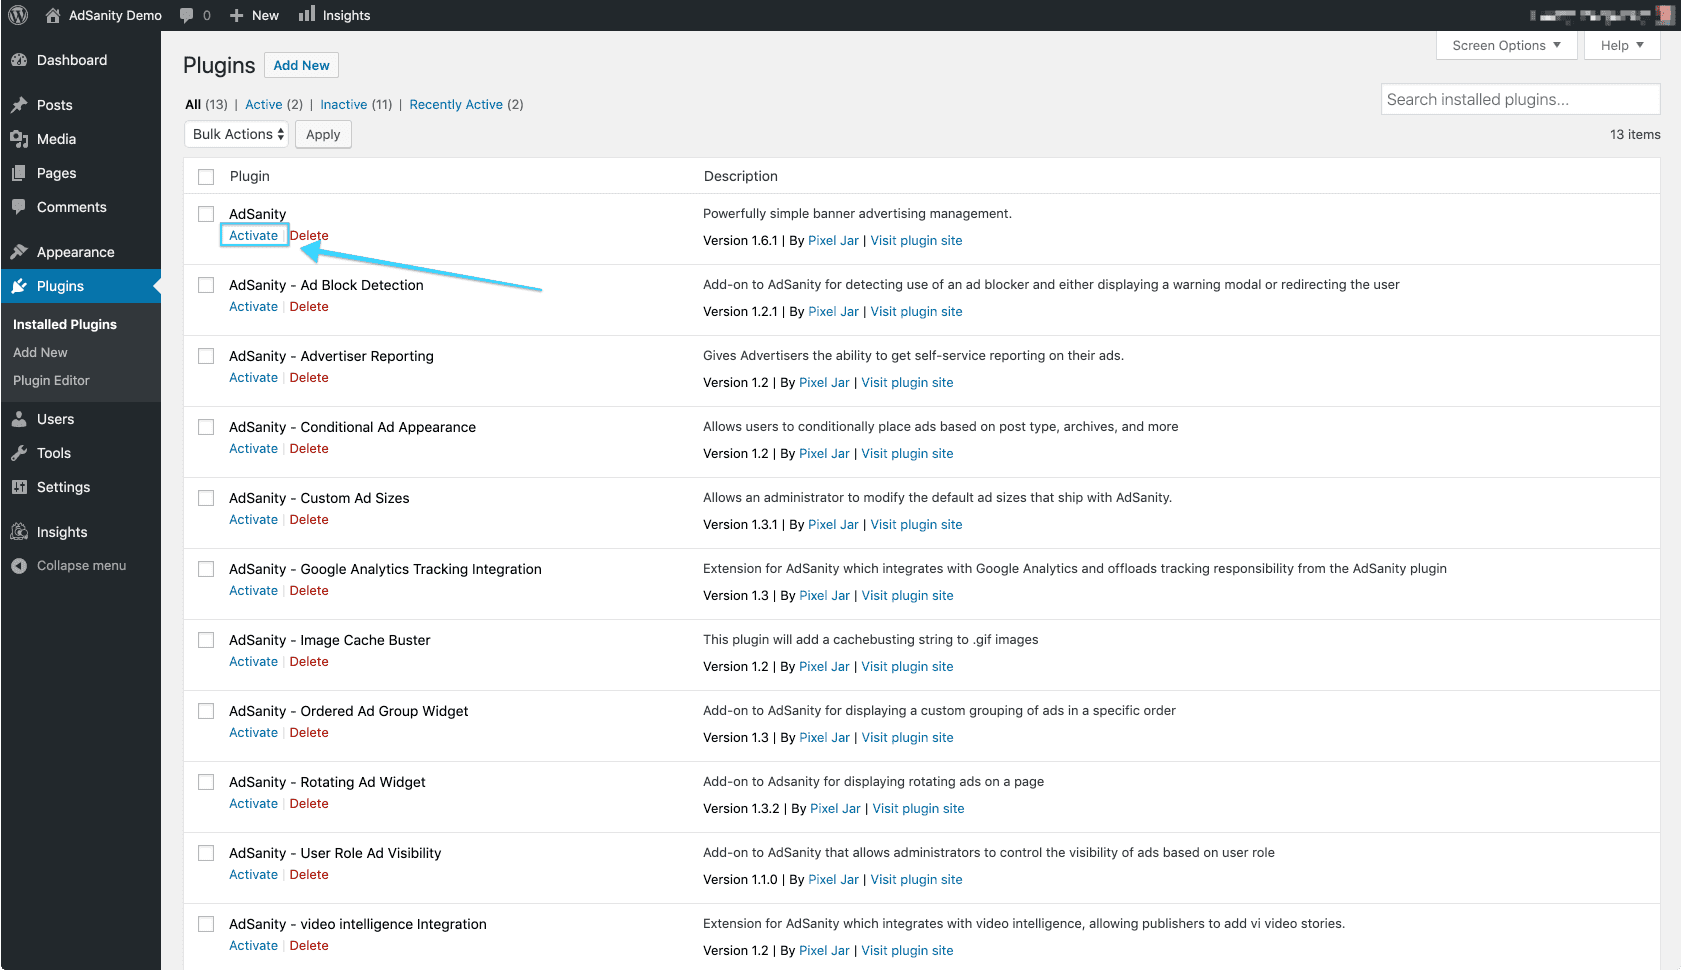
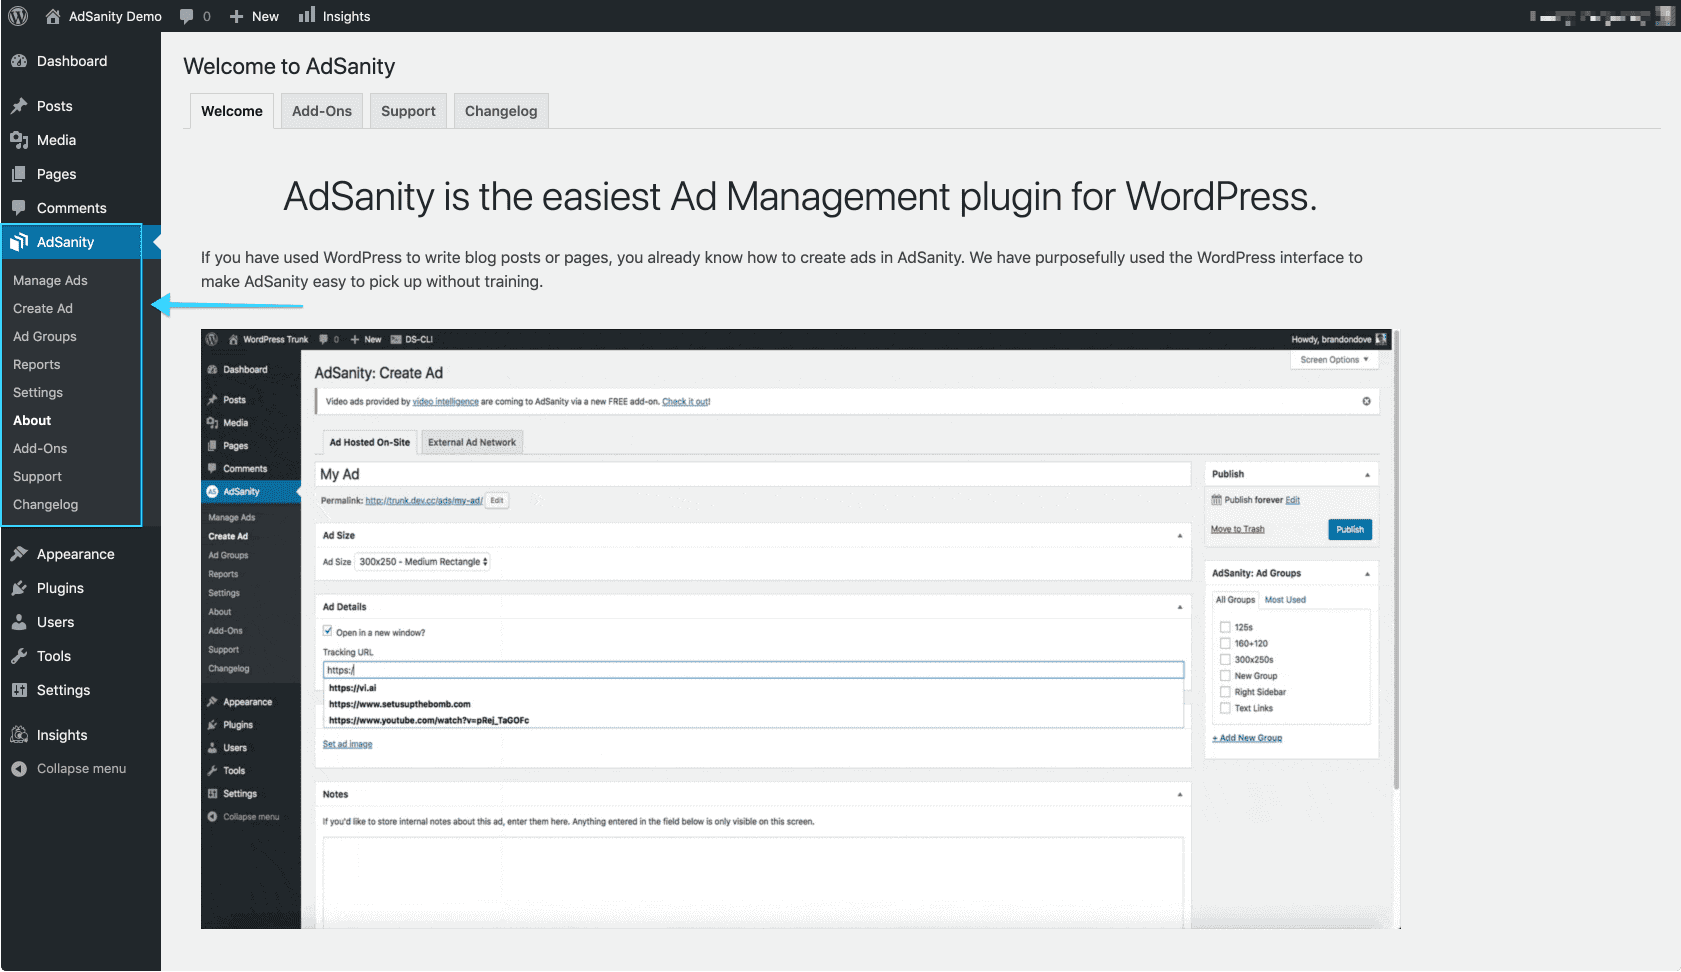
Once the plugin is installed (which should be a relatively quick process) you’ll be directed to the Installing Plugin from uploaded file page which will indicate the file you’ve uploaded. You should then click the “Activate Plugin” button to complete the installation. (fig. 3) After the plugin has been activated you will see an AdSanity section has been added to your dashboard and the plugin features are ready to use. (fig. 4)
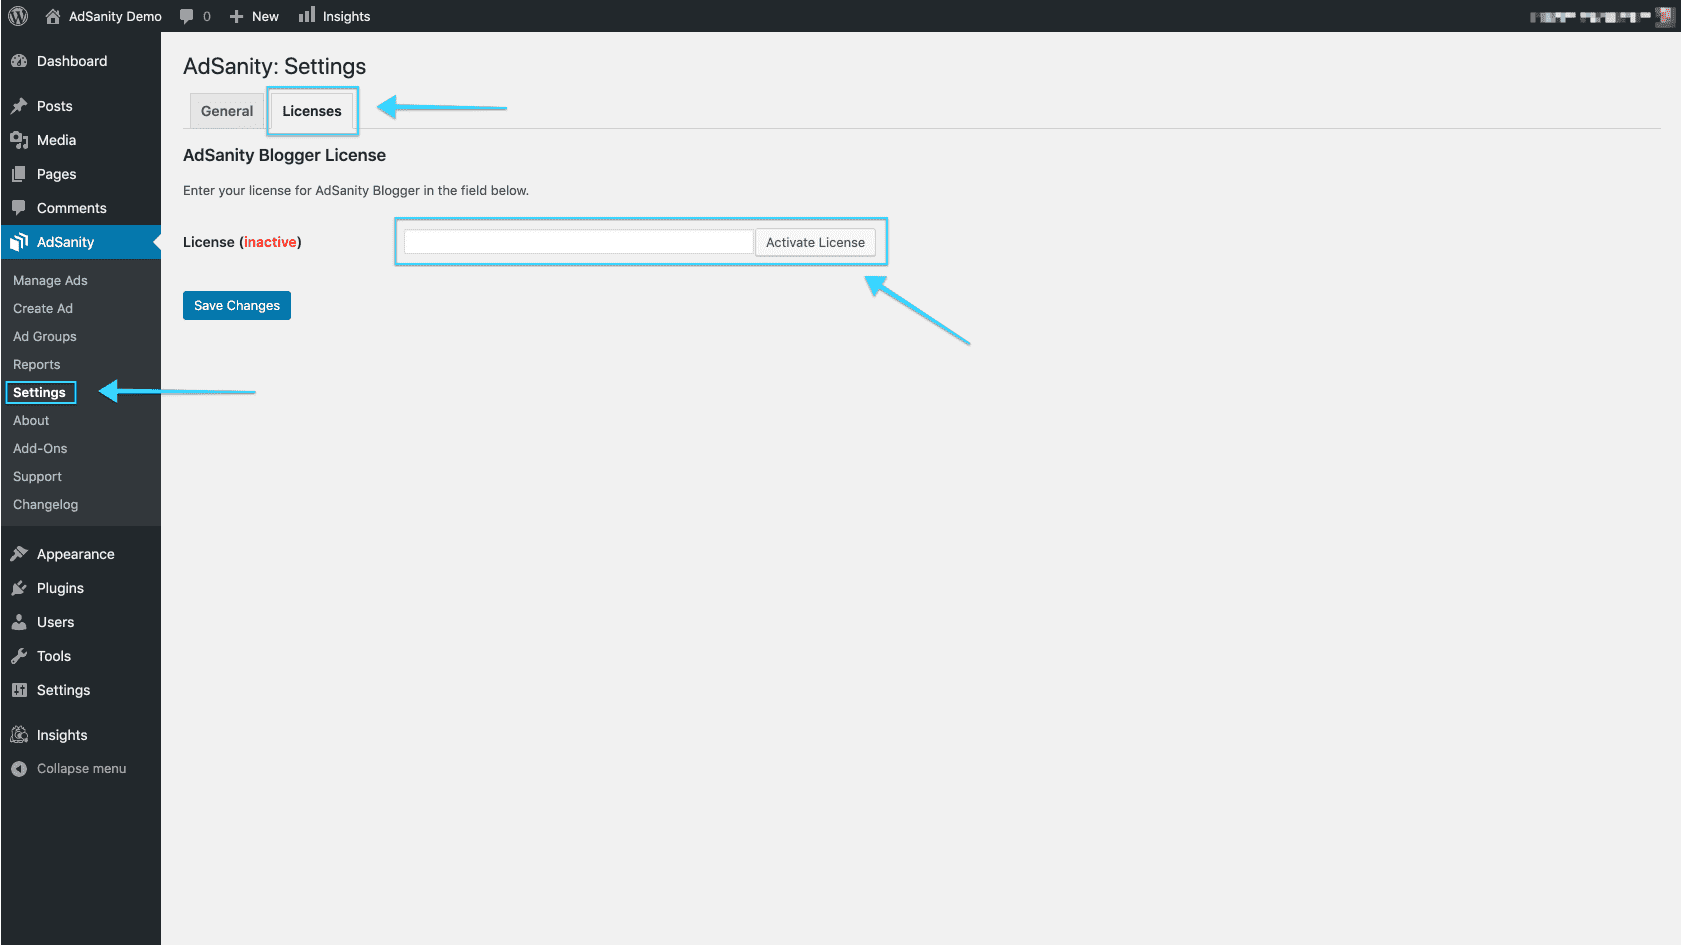
Comme étape finale, naviguez vers la page Paramètres dans la section AdSanity du tableau de bord. Vous pouvez y saisir votre clé de licence sous l'onglet Licences de la page. (fig. 5) Cette licence vous a été envoyée par e-mail au moment de votre achat ou vous pouvez la trouver sur la page de confirmation d'achat sur le site AdSanity.
Installation FTP
Many users prefer to add their plugins via FTP. FTP installation of AdSanity doesn’t differ from a normal FTP installation.
First, you’ll unzip the plugin that you downloaded from the AdSanity Plugin site. Be sure that the folder name is called “adsanity”. You’ll then connect to your website via FTP using the FTP client of your choice. The plugin folder should be uploaded to the plugins folder in the wp-content folder for your website.
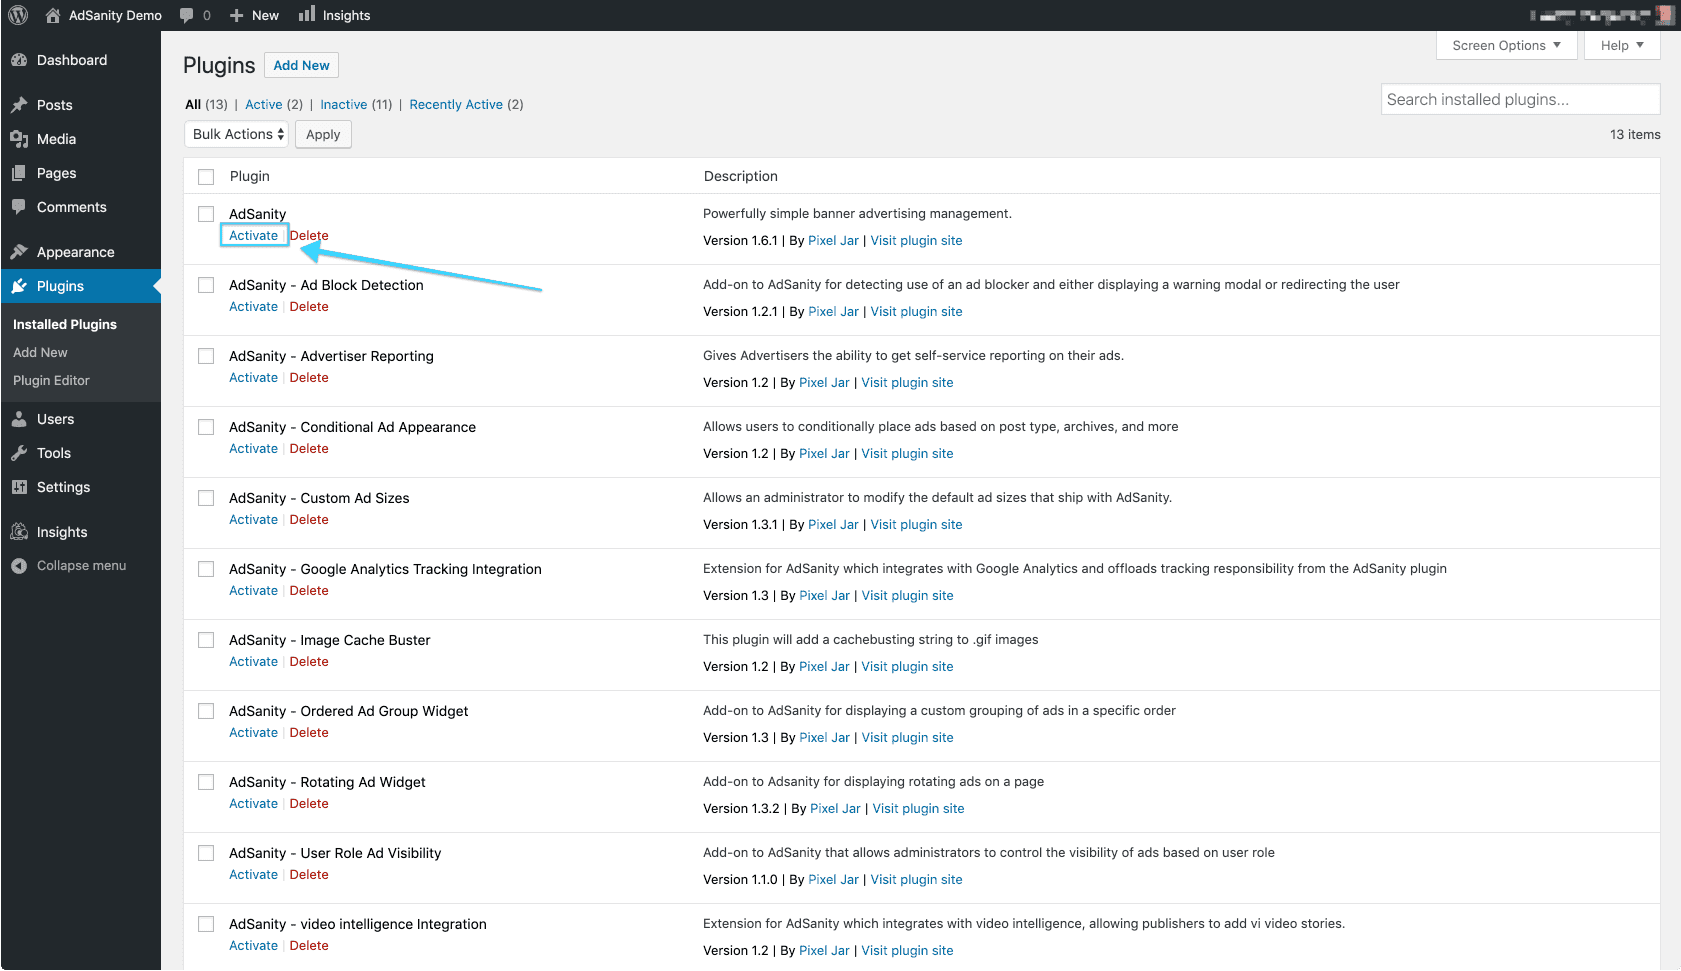
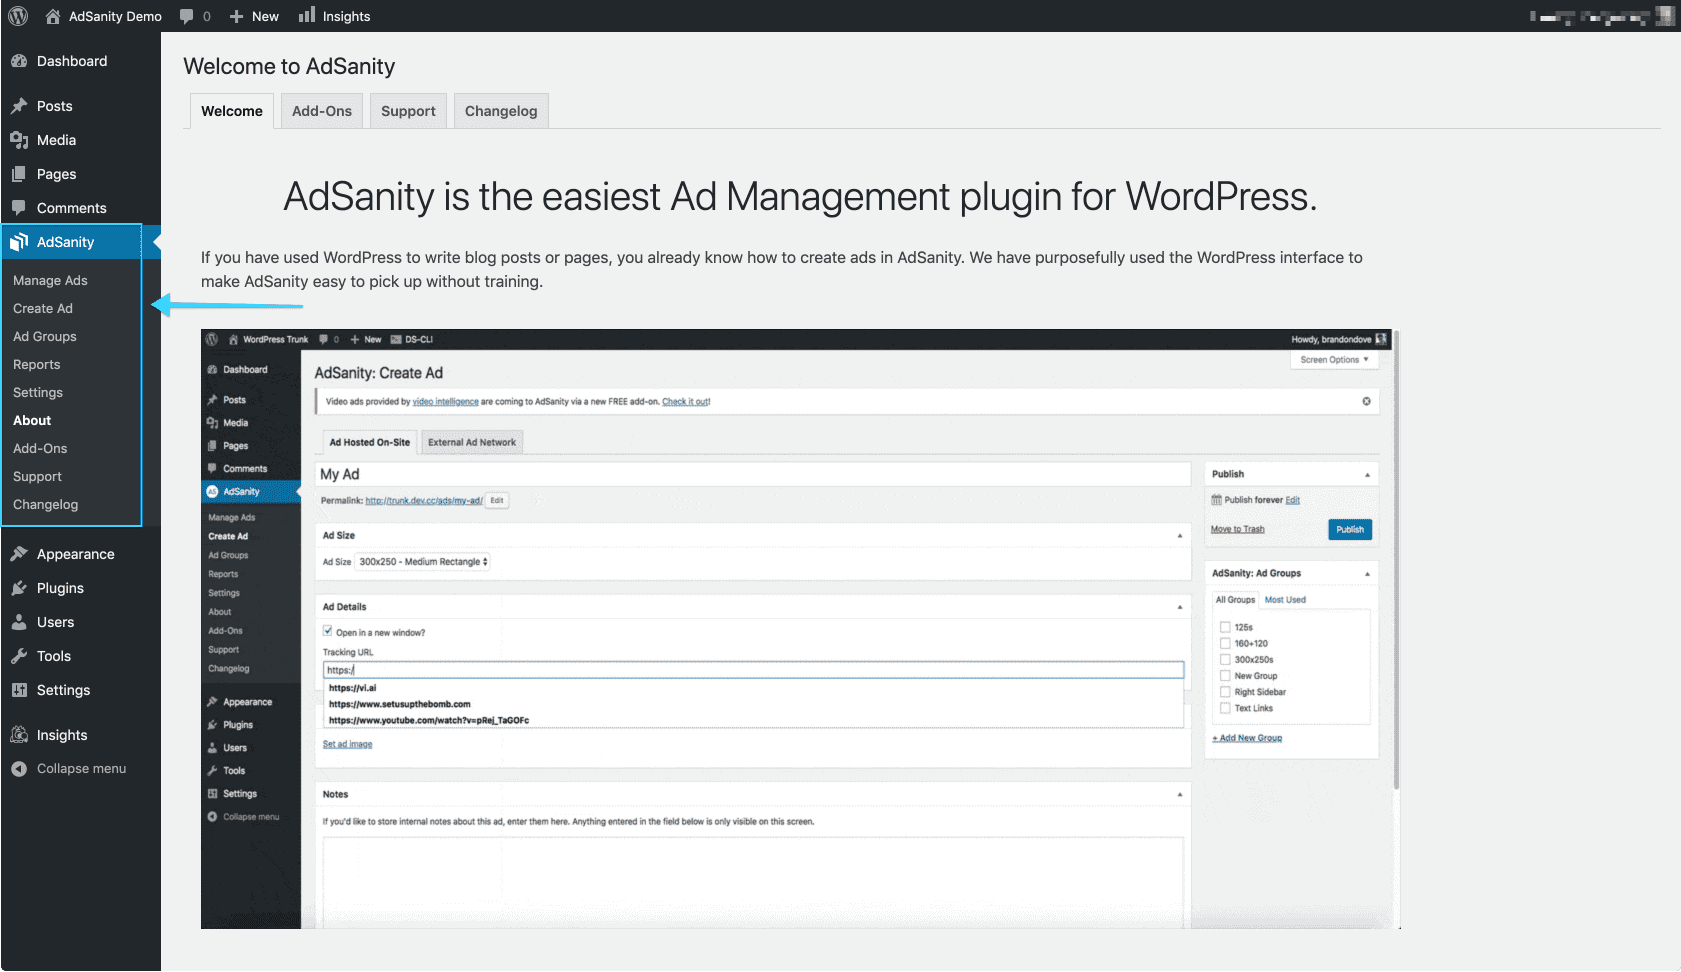
Once the plugin is installed you can return to your WordPress dashboard. Navigate to the Installed Plugins page. You should then click the “Activate” text beneath the AdSanity entry on the list of plugins to complete the installation. (fig. 1) After the plugin has been activated you will see an AdSanity section has been added to your dashboard and the plugin features are ready to use. (fig. 2)
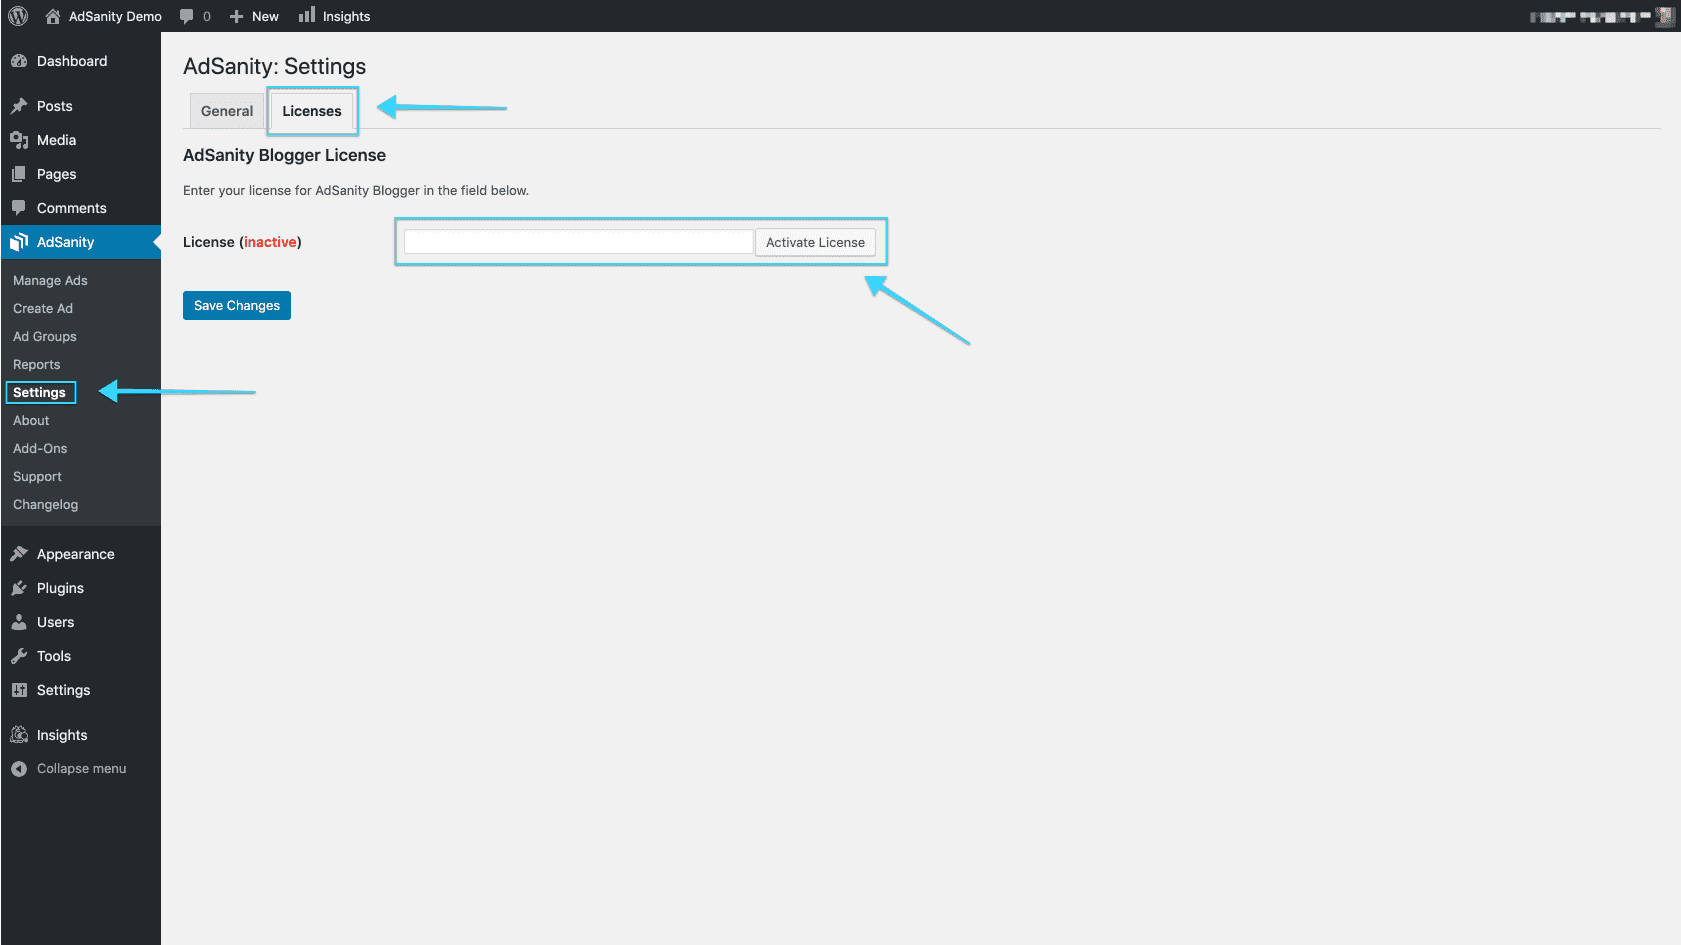
Comme dernière étape, naviguez vers l'onglet Licence sur la page Paramètres dans la section AdSanity du tableau de bord. Vous pouvez y saisir votre clé de licence. (fig. 3) Celle-ci vous a été envoyée par e-mail au moment de votre achat ou peut être trouvée sur la page de confirmation d'achat sur le site AdSanity.
Mise à niveau de AdSanity à partir de versions antérieures
La mise à niveau d'AdSanity est facile, mais si vous avez installé une version antérieure, il se peut que vous ne disposiez pas des mises à jour automatiques qui font désormais partie du plugin.
Les mises à jour automatiques ont été modifiées dans la version 1.1 d'AdSanity. Si vous disposez d'une version antérieure, vous pouvez être inquiet pour vos données publicitaires.
Vous pouvez désactiver et supprimer l'ancien plugin en toute sécurité. Les données de vos annonces sont stockées en toute sécurité dans votre base de données. Vous pouvez ensuite installer la nouvelle version d'AdSanity et vos annonces et données de suivi des clics seront intactes.
AdSanity a modifié la façon dont il traite le trafic provenant de sources frauduleuses comme les robots ou les araignées. Ces données ne sont plus collectées de la même manière et sont supprimées de la base de données lorsque la nouvelle version d'AdSanity est installée.
Didn’t find what you were looking for?
If you’re a subscriber to AdSanity and don’t find an answer to your specific question please submit a request and our support department will address your issue quickly.


