How to Sell Ads with Gravity Forms
We’ve often been asked if AdSanity offers e-commerce functionality so potential advertisers can sign up directly for an ad placement. We have always kept this sort of functionality out of AdSanity since it’s not a feature that everyone would use, and it’s certainly not a feature that everyone would use the same way. We’ve even heard of crafty ways that our users engage with other plugins to handle the purchasing process. We will show a possible solution using one of the most popular form plugins, Gravity Forms. Leveraging Gravity Forms, we’ll be able to create a quick cart so you can sell ads.
Collecting The Pieces
Before we get started, you’ll need a few plugins to make this work. Be sure to upload, install, and activate these plugins before you move on.
- AdSanity Core
- Gravity Forms Pro License or Greater
- A Gravity Forms payment gateway add-on of your choice
- Gravity Forms + Custom Post Types
Creating The Form
The first step in building a way for advertisers to pay for ad placement is to build a form using Gravity Forms. Your form may contain additional information you require from your advertisers, but I’ll just build a form with the basics. You’ll need the following fields:
Post Fields
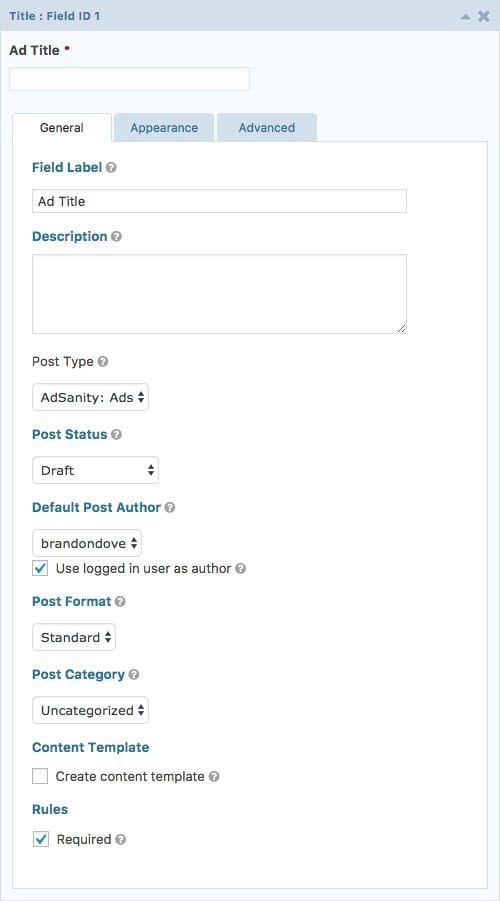
- Post Title – Allows the advertiser to specify the name for the ad and allows you to configure how the post will get created. Under the options for this field, you’ll want to select “AdSanity: Ads” under the Post Type field. You can optionally set each submission as a draft if you’d like to review each ad before it goes live on your site. Manual review may cause an extra step, but it is valuable if you think your competitors might try to post an ad on your site. Be sure to set this field as required.
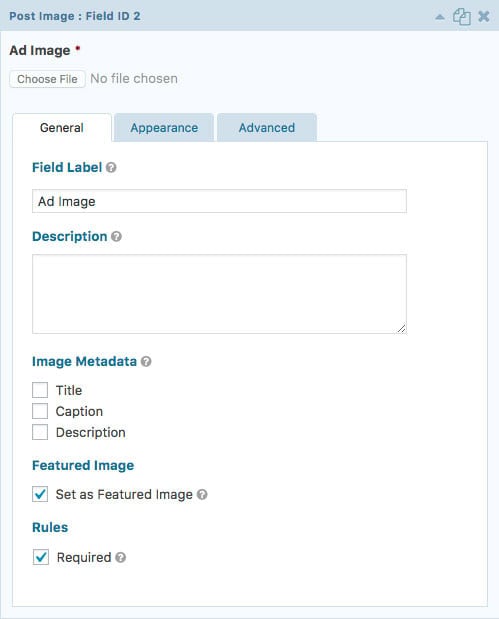
- Post Image – Allows the advertiser to upload their banner artwork. Make sure to tick the checkbox next to “Set as Featured Image” and make this field required.
- Custom Field – This field allows the selected product option to populate the ad size. You’ll set this field type as “Single line text” and choose “new” under Custom Field Name. In the field below that, enter “_size.” Tick the box next to “Create content template” and insert the value of the Option pricing form field (see below) for size. Under the advanced tab, set the visibility to hidden.
- Custom Field – Allows the advertiser to specify a URL to take the end-user to when they click an ad. Set this field up as a website field type and choose “new” under Custom Field Name. In the field below that, enter “_url.”
Pricing Fields
- Product – This will hold the total product cost of the purchase based on the size option selected by the user. Be sure to set the field type to hidden.
- Option – This will allow the advertiser to select the ad unit size they want to purchase. Choose “Drop Down” from the field type. In the choices section, fill out the Label, Value, and Price fields with the size of ads that you want to offer your advertisers. For example, if you want to offer 300×250 ads, you can put “300×250 – Medium Rectangle” for the label, “300×250” for the value, and whatever you’d like for the pricing. Make sure that this field is required.
- Total – This displays the cost to the advertiser. No additional configurations are necessary.
These are the minimum required fields to create an ad, but you might find it important to be able to communicate with your advertisers from time to time, so adding additional fields such as name and email might be helpful. Once you’re done configuring all of your fields, save your form.
Configuring Gravity Forms To Talk To Your Payment Gateway
To enable communication between Gravity Forms and your payment gateway, you must configure your payment gateway. Navigate to the Gravity Forms settings page in your dashboard. Click the tab containing your chosen payment gateway and follow the directions to enable communication with Gravity Forms. If you need further help, follow the links to the documentation for each payment gateway listed above.
Once you have configured the payment gateway, navigate to the settings for the payment form. You’ll see an option for your payment gateway in the settings area. Create a new feed to process the form, ensuring your payment gateway is in production mode and the amount is set to the Form Total. Finally, check the Checkbox next to “Create post only when payment is received.”
Now, your form is ready to process payment with your payment gateway whenever someone submits an ad. Once the payment is processed, a new Ad will be created and set as a Draft for you to review. An email notice will automatically be sent to your advertiser and to you, letting you know of the new submission.
The last step to getting this to work is to create a page where you describe your advertising opportunities and embed the Gravity Form for your users to interact with. This page should be accessible wherever your advertisers look for it. Typically, this is in your main navigation or your footer. Another good option as you’re starting is to create an “advertise with us” ad in AdSanity and link to this page. You can then include this ad in your rotations to attract new advertisers and visually show advertisers where ads can be displayed.
Ready to get started?
Time to take control of your ads.
Find your perfect plan and go for it.
Ready to Make Money With Your Site?
Get ads on your site in
60 minutes or less
with AdSanity.
With our 14-day money back guarantee, it’s easy to see if AdSanity is the right fit for you.
Tags
Popular Pro Add-Ons


Our Community
Join our mailing list to keep up to date on everything happening with AdSanity and Pixel Jar.
Note: Your email address will be added to our CRM and be used to receive emails from Pixel Jar. You can unsubscribe at any time.
Our Partners

